Tag: 7-day balance plan

  • Shift Your Weight, Steady Your Steps

    Shift Your Weight, Steady Your Steps

    Jean did not think much about shifting her weight until it became difficult.

    For most of her life, she had moved from one foot to the other without noticing. She stepped around furniture, reached into cupboards, turned in the garden, and walked across uneven ground almost automatically.

    Then she began hesitating.

    Before taking a sideways step, she would grip the kitchen bench. When reaching for something, she kept her body rigid instead of moving naturally over her feet. She was not always dizzy or weak. She simply felt uncertain whenever her weight moved away from the middle.

    That uncertainty matters because nearly every everyday movement involves a weight shift.

    Before lifting one foot, you must transfer enough weight onto the other leg. Before stepping sideways, you must move your body over the supporting foot. Even standing up from a chair requires your weight to travel forward before your hips can leave the seat.

    Easy weight-shift exercises for older adults break these movements into small, controlled parts. They can help beginners practise how pressure moves beneath the feet, how the ankles and hips respond, and how to return to a stable position.

    No complicated equipment is required. A sturdy chair, a clear floor, and several minutes of calm practice are enough to begin.

    What Is a Weight Shift?

    A weight shift happens whenever more of your body weight moves from one part of your base to another.

    While standing with both feet on the floor, your weight may be distributed fairly evenly. Move towards the right, and the right leg begins carrying more of you while the left foot becomes lighter. Continue shifting far enough, and the left foot may be able to lift.

    This is the beginning of a step.

    Weight shifts also occur in other directions. You move forward when reaching across a table, backwards when opening a heavy door, and diagonally when stepping around an obstacle.

    When balance feels uncertain, these movements may become smaller, faster, or more rigid. A person may lift a foot before the supporting leg is ready, bend abruptly from the waist, or reach for furniture instead of allowing the ankles and hips to guide the movement.

    Practising weight shifts slowly can make these transitions feel more predictable.

    Why Weight Shifting Supports Balance

    Balance depends on information from the eyes, inner ears, nerves, muscles, and joints. The brain combines this information and directs the body to make constant corrections.

    Weight-shift exercises give this system a manageable challenge. The body moves slightly away from its centred position, recognises the change, and returns under control.

    These drills may also help with:

    • Preparing one leg to accept more weight
    • Coordinating the feet and trunk
    • Improving awareness of pressure beneath the feet
    • Practising movement without lifting a foot immediately
    • Building confidence before stepping exercises
    • Reducing rigid, fearful movement
    • Preparing for walking and turning

    Balance activity is recommended as part of a broader older-adult exercise routine that also includes muscle strengthening and aerobic movement. citeturn245277search0turn245277search21

    Weight shifts alone cannot address every cause of instability, but they can provide a useful starting point.

    Set Up a Safe Practice Area

    Choose a level, dry floor in a well-lit room.

    Place a sturdy chair directly in front of you. It should not have wheels, rock, fold unexpectedly, or slide when pressure is applied. Position its back against a wall when possible.

    A fixed kitchen bench may also provide suitable support.

    Remove potential hazards from the area, including:

    • Loose rugs
    • Electrical cords
    • Bags and footwear
    • Pet toys
    • Low tables
    • Wet patches
    • Clutter near your feet

    Wear comfortable, well-fitting shoes with nonslip soles. Loose slippers and socks on smooth flooring may increase the risk of slipping.

    Keep another chair nearby so you can sit and rest. Someone should remain with you if you have fallen recently, require help to stand, or are unsure whether you could recover safely from a wobble.

    Begin With More Support Than You Need

    Start with both hands on the chair.

    This allows you to learn the movement without turning every repetition into a test. Once an exercise feels controlled, you may rest your hands more lightly.

    A gradual progression might involve:

    1. Holding firmly with both hands
    2. Resting both hands lightly
    3. Using one hand
    4. Touching with several fingertips
    5. Hovering the hands near the chair

    There is no need to reach the final stage. Some older adults may always need hand support and can still gain useful practice.

    The right amount of support allows your legs to work while keeping you safe.

    Easy Weight-Shift Routine for Beginners

    Move slowly and breathe normally. Begin with one set of each exercise.

    The complete routine may take approximately 10 minutes, but you can stop earlier if your legs become tired or your control begins to decline.

    1. Centred Standing

    Stand behind the chair with your feet approximately hip-width apart.

    Place both hands on the chair. Keep your knees softly relaxed, your shoulders comfortable, and your head upright.

    Notice how the floor feels beneath your feet. Try to feel pressure through the heels, the balls of the feet, and the toes.

    Take five slow breaths.

    Ask yourself:

    • Am I leaning more heavily onto one leg?
    • Are my toes gripping the floor?
    • Am I pulling against the chair?
    • Are my knees locked?

    Make small adjustments until your standing position feels reasonably even.

    Hold for 20 to 30 seconds.

    This centred position gives you a clear place to return after every weight shift.

    2. Small Side-to-Side Shifts

    Slowly move more of your weight onto the right foot.

    Keep both feet on the floor. Pause briefly, return to the centre, and shift towards the left.

    Complete eight to ten shifts in each direction.

    Keep your body tall rather than bending sideways at the waist. Imagine your ribs, hips, and shoulders moving together as one unit.

    The movement may be only a few centimetres. That is enough.

    As you shift right, notice the left foot becoming lighter. You are practising the first stage of moving that foot without needing to lift it.

    3. Side Shift With a Light Toe

    Shift your weight onto the right leg.

    Keep the toes of the left foot touching the floor, but gradually reduce the pressure through them. Imagine the foot becoming lighter without lifting it.

    Hold for three seconds, then return your weight to the centre.

    Repeat on the other side.

    Complete four to six repetitions per leg.

    This exercise provides a bridge between a basic weight shift and standing briefly on one leg. The light toes act like a kickstand.

    Do not lift the foot until you can make it light without leaning heavily onto the chair.

    4. Forward Weight Shifts

    Keep your feet hip-width apart and both hands supported.

    Move your body weight slightly towards the balls of your feet without lifting your heels.

    Pause briefly and return to the centre.

    Repeat eight to ten times.

    Keep your body relatively straight. Avoid bending forward from the waist or pushing your hips backwards.

    The movement should come mainly from the ankles. It may feel as though your whole body is tilting forward by a very small amount.

    This resembles the beginning of reaching or stepping forward.

    5. Backward Weight Shifts

    From the centred position, shift your weight gently towards your heels.

    Keep your toes in contact with the floor. Pause, then return to the middle.

    Repeat eight to ten times.

    Do not lean far backwards. Your hands should remain ready to grip the chair.

    Backward shifts can feel less familiar than forward shifts, so keep the movement particularly small. The aim is to recognise the changing pressure beneath your feet without losing control.

    6. Diagonal Weight Shifts

    Stand with your feet comfortably apart.

    Shift your weight slightly towards the front of your right foot. Return to the centre.

    Next, shift towards the front of the left foot.

    Complete six to eight repetitions on each side.

    Diagonal movement is common during daily life. You may use it when reaching across a table, stepping around a door, or changing direction while walking.

    Keep both feet on the floor and move only within a comfortable range.

    7. Shift and Side Tap

    Transfer your weight onto the left leg.

    When the right foot feels light, move it a short distance to the side and tap the floor.

    Return the foot beneath you and redistribute your weight evenly.

    Repeat five to eight times, then change sides.

    Keep the tap close enough that you can return without pulling heavily on the chair.

    This drill teaches the sequence used during stepping:

    1. Shift the weight
    2. Lighten the opposite foot
    3. Move the foot
    4. Place it down
    5. Return to centre

    Moving through this sequence slowly can make stepping feel more organised.

    8. Shift and Forward Tap

    Move your weight onto the left leg.

    Place the right foot a short distance forward and tap the heel or whole foot on the floor.

    Return it to the starting position.

    Repeat with the opposite leg.

    Complete five to eight taps per side.

    Do not reach far. A small tap is enough to challenge the supporting leg.

    Try not to lift the foot before you have shifted enough weight onto the other side.

    9. Shift and Backward Toe Tap

    Hold the chair securely.

    Move your weight onto the left leg. Slide or step the right foot a short distance behind you and tap the toes down.

    Return to the middle.

    Repeat five times, then change sides.

    Keep the movement small and remain upright. Avoid arching the back or leaning forward.

    Backward movements can be challenging for beginners, so practise only while holding secure support.

    10. Staggered Weight Shifts

    Place the right foot slightly ahead of the left, as though you have paused during a step.

    Keep some space between the feet from side to side. Do not place them on one narrow line.

    Slowly move a little more weight onto the front foot. Return towards the back foot without lifting either foot.

    Repeat six to ten times, then change which foot is in front.

    This exercise resembles the transfer that occurs as you step forward while walking.

    Keep the movement small. You should not feel as though either foot is about to slide.

    11. Sit-to-Stand Weight Transfer

    Sit towards the front of a firm chair that cannot slide.

    Place your feet flat and slightly behind your knees.

    Lean your upper body forward from the hips until your chest moves over your feet. Feel your weight transfer from the chair into your feet.

    Press through your legs and use the armrests or seat if needed to stand.

    Pause until steady, then push your hips backwards and lower yourself slowly.

    Complete three to eight repetitions.

    If a full stand is difficult, practise only the forward shift. Lean forward until your hips become slightly lighter, then return to sitting.

    This teaches one of the most important weight transfers used in daily life.

    How to Avoid Common Mistakes

    Weight-shift exercises are simple, but small technique changes can affect their safety.

    Bending Instead of Shifting

    If you bend sideways from the waist, your body may not move properly over the supporting foot.

    Try to keep your trunk long and move your ribs and hips together.

    Moving Too Far

    A larger shift is not automatically better.

    Move only far enough to notice the pressure change. Return before you need to grab the chair suddenly.

    Lifting the Foot Too Early

    If a foot feels difficult to lift, the supporting leg may not yet be carrying enough weight.

    Practise making the moving foot lighter before attempting to raise it.

    Locking the Knees

    Rigid knees can make movement feel stiff and uncomfortable.

    Keep both knees softly relaxed without deliberately bending deeply.

    Looking Down Constantly

    Glance down when checking foot placement, but try to return your gaze forward. Keeping the head upright can support a more natural standing posture.

    Holding Your Breath

    Breathe continuously. Holding your breath may increase tension and make the movement feel more difficult.

    How Often Should You Practise?

    Two or three short sessions per week can be a manageable starting point. Current older-adult guidance supports regular balance practice alongside strengthening and aerobic activity. citeturn245277search6turn245277search21

    You do not need to complete every exercise during each session.

    A five-minute routine might include:

    • Centred standing
    • Side-to-side shifts
    • Forward and backward shifts
    • Side taps
    • Sit-to-stands

    Stop before your legs become shaky or your foot placement becomes careless.

    Several controlled minutes performed regularly are more valuable than one long session that leaves you exhausted.

    How to Progress Safely

    Change only one feature at a time.

    You might:

    • Add two repetitions
    • Pause for one extra second
    • Move slightly more slowly
    • Tap the foot a little farther
    • Use lighter hand pressure
    • Complete one additional sit-to-stand
    • Practise one extra direction

    Do not reduce your support while also increasing the movement range and number of repetitions.

    Avoid closing your eyes, standing on cushions, or using unstable furniture. These changes can sharply increase the balance challenge and may be unsafe for beginners.

    Progress may also mean smoother movement, less gripping, or greater confidence. It does not always mean performing the exercise without support.

    When Unsteadiness Needs Assessment

    Weight shifts can improve movement control, but they cannot diagnose or correct every balance problem.

    Arrange an appropriate assessment if you experience repeated falls, persistent dizziness, spinning sensations, new foot dragging, significant numbness, or a sudden change in walking.

    Medicines, blood pressure changes, vision, hearing, sensation, joint problems, and other health conditions can all influence balance. Fall prevention is most effective when physical ability, medical factors, footwear, and the home environment are considered together. citeturn245277search2turn245277search17

    Stop exercising and seek urgent help for chest pain, fainting, sudden facial drooping, difficulty speaking, one-sided weakness, severe breathlessness, or a sudden severe headache.

    Small Shifts Create Bigger Changes

    Weight-shift practice may not look dramatic.

    You move a few centimetres to the side. You pause over one foot. You tap the other foot forward and return.

    Yet these small movements form the foundation of walking, reaching, turning, and stepping around obstacles.

    Progress may first appear outside the routine. You might notice that you step sideways in the kitchen without immediately reaching for the bench. Perhaps standing from a chair feels smoother, or you can begin walking without taking several uncertain preparation steps.

    These changes matter.

    Balance is often built through quiet repetition rather than impressive effort. Begin with the chair beside you, move slowly, and allow every controlled shift to teach your body where to go next.

    Frequently Asked Questions

    1. What is the easiest weight-shift exercise for a beginner?

    A small side-to-side shift with both feet on the floor is often a suitable starting point. Hold a sturdy chair, move only a few centimetres, and return to the centre after each repetition.

    2. How far should I shift my weight?

    Shift only far enough to notice more pressure beneath one foot. You should still feel controlled and able to return without grabbing the chair suddenly. Greater distance is not necessary for a beginner.

    3. Is it normal for one side to feel less steady?

    Some difference between sides is common. Use more hand support and a smaller movement on the less steady side. New, pronounced, or worsening one-sided weakness should be medically assessed.

    4. How often should older adults practise weight shifts?

    Two or three short sessions per week may be a practical starting point. Gentle shifts can sometimes be performed more frequently when they do not cause pain, dizziness, or excessive fatigue.

    5. Should my feet lift during a weight shift?

    Not during the basic version. Keep both feet on the floor until you can transfer your weight smoothly. Later, you may add a toe tap or small foot lift while holding secure support.

    6. Can weight shifting improve walking?

    Weight shifts practise the transfer of body weight required before each step. They may help walking feel more controlled when combined with appropriate stepping, strengthening, and regular walking practice.

    7. What should I do if I become dizzy?

    Stop immediately, hold the chair, and sit down safely. Do not continue until the dizziness has resolved. Repeated, severe, or unexplained dizziness should be discussed with an appropriate health professional.

    8. Can weight-shift exercises prevent every fall?

    No. They may improve balance skills and movement control, but no exercise can prevent every fall. Vision, medicines, footwear, blood pressure, sensation, fatigue, health conditions, and environmental hazards may also affect fall risk.
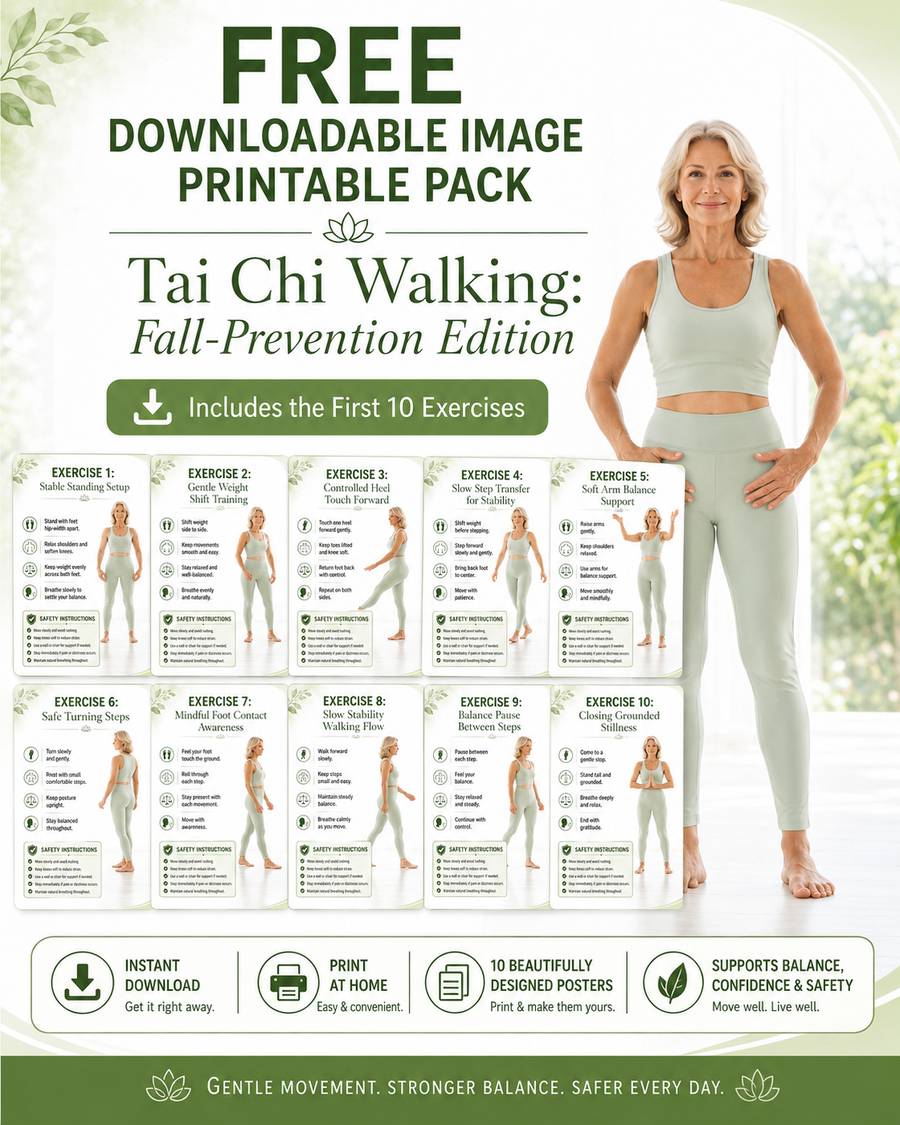
    Free Tai Chi Walking: Fall‑Prevention Edition Printables

    Free Tai Chi Walking: Fall‑Prevention Edition Printables

    Get Your Copy Today
  • One Foot at a Time: Supported Balance for Beginners

    One Foot at a Time: Supported Balance for Beginners

    Standing on one leg sounds simple until you try it.

    The moment one foot leaves the floor, the body has much less space beneath it. The supporting ankle begins making tiny corrections. The hip muscles work to keep the pelvis level. The trunk adjusts to prevent the upper body from leaning too far, while the eyes, inner ears, nerves, and brain coordinate the entire effort.

    For an older adult who feels uncertain on their feet, this can seem less like exercise and more like a test they are expected to fail.

    It should not be treated that way.

    Beginner single-leg balance practice should be supported, gradual, and adaptable. The goal is not to let go of the chair as quickly as possible or hold a dramatic pose. The goal is to teach one leg to accept more weight while the other foot becomes lighter, first with the toes still touching the floor and eventually with a very small lift.

    Standing on one foot is recognised as a balance activity for older adults, and beginners are advised to keep a sturdy chair, wall, or suitable person nearby for support. citeturn176605search0turn176605search2

    With the right setup, single-leg practice can become a useful part of building steadier steps and greater confidence.

    Why Single-Leg Balance Matters

    Walking is a repeating series of brief single-leg stands.

    Before your right foot can move forward, your weight must transfer onto your left leg. The left ankle, knee, hip, and trunk then work together to keep you upright while the right foot travels through the air.

    This happens so quickly that most people never think about it.

    Single-leg control is also used when:

    • Stepping over a doorway threshold
    • Climbing a stair
    • Moving around an obstacle
    • Getting into a vehicle
    • Putting on trousers
    • Stepping into a shower
    • Walking across uneven ground
    • Recovering after an unexpected wobble

    Supported practice breaks this skill into manageable parts. You can learn to shift your weight, lighten one foot, lift it briefly, and place it down without rushing.

    This does not mean that single-leg exercises alone will prevent falls. Balance, leg strength, vision, sensation, medicines, footwear, health conditions, and the surrounding environment can all influence fall risk. Balance activities are most useful when combined with appropriate strengthening and regular physical movement. citeturn176605search1turn176605search3

    Begin With Support, Not Pride

    Many beginners make the exercise unnecessarily dangerous by using too little support.

    They touch the chair with one finger when they really need both hands. They lift the foot higher than necessary or hold the position until the supporting leg begins shaking.

    None of this improves the quality of the exercise.

    Start with both hands on a secure surface. This gives you time to learn the movement without becoming tense or frightened. As your control improves, you can gradually reduce how much pressure you place through your hands.

    A sensible progression may look like this:

    1. Both hands holding firmly
    2. Both hands resting lightly
    3. One hand holding
    4. Several fingertips touching
    5. One fingertip touching
    6. Hands hovering close to the support

    You do not need to reach the final stage. Some older adults will continue using hand support, and the exercise can still challenge the supporting leg.

    Success means moving with greater control, not proving that the chair is unnecessary.

    Create a Safe Practice Space

    Choose a flat, dry floor in a well-lit room.

    Use a sturdy chair without wheels. It should not rock, fold unexpectedly, or slide when you press against it. Position the chair against a wall whenever possible.

    A secure kitchen bench may also be suitable. Do not rely on a lightweight table, towel rail, movable trolley, or unstable piece of furniture.

    Clear the surrounding area of loose rugs, electrical cords, bags, footwear, pet toys, and low objects. Keep pets in another room if they tend to walk close to your feet.

    Wear secure, well-fitting footwear with nonslip soles. Avoid loose slippers and socks on smooth flooring.

    Keep another chair nearby for rest. Someone should remain with you if you have fallen recently, require physical assistance to stand, or are unsure whether you could recover safely from a wobble.

    Do not begin unsupported single-leg practice if you already struggle to stand safely with both feet on the floor.

    The Supported Single-Leg Balance Routine

    Perform the exercises slowly and breathe normally. Begin with one set and rest whenever your legs become tired.

    The early exercises prepare you for lifting a foot. Do not skip them simply because they appear easy.

    1. Centred Standing

    Stand behind the chair with your feet approximately hip-width apart.

    Place both hands on the chair. Keep your knees softly relaxed, your shoulders comfortable, and your head upright.

    Notice how your weight is distributed. Try to feel pressure through both heels, the balls of the feet, and the toes.

    Take five slow breaths.

    Hold the position for 20 to 30 seconds.

    This gives you a stable starting point. It also helps reveal whether you naturally lean onto one leg or grip the floor with your toes.

    2. Side-to-Side Weight Shifts

    Slowly move more of your weight onto your right foot.

    Keep both feet on the floor. Pause briefly, return to the middle, and shift towards the left.

    Complete eight to ten shifts in each direction.

    Keep your body tall rather than bending sideways at the waist. Imagine your shoulders, ribs, and hips moving together over the supporting foot.

    As you shift right, notice the left foot becoming lighter. This is the first stage of standing on one leg.

    3. The Kickstand Hold

    Shift your weight onto your left leg.

    Keep the toes of your right foot on the floor, but reduce the pressure through them. Imagine that the toes are acting like a kickstand rather than carrying your weight.

    Hold for three to five seconds.

    Return your weight evenly to both feet, then repeat on the opposite side.

    Complete three to five holds per leg.

    This is one of the most useful starting exercises because it challenges the supporting leg while the other foot remains available for immediate assistance.

    4. Toe-Tip Balance

    From the kickstand position, move the lighter foot slightly behind you and rest only the tips of the toes on the floor.

    Keep both hands on the chair.

    Hold for five to ten seconds, then change sides.

    Try not to twist your hips or lean heavily towards the chair. Keep the supporting knee soft rather than locked.

    The toe contact provides reassurance while increasing the amount of work performed by the supporting leg.

    5. Heel Lift and Hover

    Shift your weight onto your left leg.

    Lift the right heel while keeping the toes on the floor. When you feel stable, allow the toes to become very light or hover just above the floor for one second.

    Lower the foot and repeat on the other side.

    Complete three to five attempts per leg.

    The foot may lift by less than a centimetre. That is enough.

    Avoid pulling the knee high towards the chest. A small hover is safer and often more effective for learning control.

    6. Supported Single-Leg Hold

    Hold the chair with both hands.

    Shift your weight fully onto the left leg. Lift the right foot one or two centimetres from the floor.

    Hold for three to five seconds, then lower the foot gently.

    Repeat on the other side.

    Complete two or three holds per leg.

    Look forward rather than staring continuously at the feet. Keep the supporting knee softly relaxed and the pelvis approximately level.

    If the ankle rolls, the knee buckles, or your body leans sharply, return to the kickstand version.

    7. Low Supported Marching

    Stand behind the chair and lift one foot slightly.

    Place it down completely before lifting the other foot.

    Continue for 10 to 20 slow alternating steps.

    Pause for one second during each foot lift.

    Marching combines repeated single-leg moments with weight shifting. It is often more relevant to walking than holding one position for a long time.

    Keep the lifts low and quiet. Avoid bouncing or rushing from one leg to the other.

    8. Forward Toe Tap

    Shift your weight onto the left leg.

    Move the right foot a short distance forward and tap the heel or toes on the floor. Return it beneath you.

    Repeat five to eight times, then change sides.

    The supporting leg remains active while the moving foot travels away from the body.

    Keep the tap close enough that you can return without pulling heavily against the chair.

    9. Side Toe Tap

    Move your weight onto the left leg.

    Tap the right foot a short distance to the side, then bring it back.

    Repeat five to eight times before changing sides.

    Keep your toes facing generally forward. Avoid allowing the supporting knee to collapse inward.

    This exercise strengthens the connection between single-leg support and sideways stepping, which is useful when navigating furniture and narrow spaces.

    10. Backward Toe Tap

    Hold the chair securely.

    Shift onto the left leg and move the right foot a short distance behind you. Tap the toes on the floor and return.

    Repeat five times, then change sides.

    Remain upright rather than bending forward or arching your back.

    Backward movements can feel unfamiliar, so keep the range small and maintain both-hand support.

    11. Clock Taps

    Imagine you are standing in the centre of a clock.

    Support your weight on the left leg while holding the chair. Tap the right foot towards 12 o’clock, return to the centre, and then tap towards 3 o’clock.

    When comfortable, add a small tap towards 5 o’clock.

    Complete the sequence three times, then change legs.

    This drill teaches the supporting leg to remain controlled while the other foot moves in several directions.

    The taps do not need to travel far. Accuracy and control matter more than distance.

    12. Step and Pause

    Take a small step forward with your right foot.

    Transfer your weight onto it and pause briefly as the left heel becomes lighter. Return to the starting position.

    Repeat with the left foot.

    Complete five to eight steps per side.

    This exercise connects supported single-leg practice to walking. It teaches you to accept weight on the front leg before moving again.

    Keep the steps short and use the chair throughout.

    How Long Should You Hold?

    Beginners do not need to hold a single-leg position for 30 or 60 seconds.

    Three to five controlled seconds may provide a meaningful challenge. As the exercise becomes easier, increase the hold gradually to 10 seconds.

    Quality matters more than duration.

    End the hold when:

    • The ankle begins rolling
    • The knee starts buckling
    • Your hips shift sharply
    • You lean heavily through your arms
    • You hold your breath
    • The supporting leg shakes strongly
    • You feel frightened or unable to recover

    Lower the raised foot before control is lost.

    A short, successful hold teaches better movement than a long struggle.

    Practise Both Sides Without Forcing Equality

    It is common for one leg to feel steadier.

    You may have a dominant side, an old injury, joint stiffness, or different strength between the legs. Use more support and shorter holds on the less steady side.

    Do not force it to match the stronger leg immediately.

    You might complete a five-second hold on one side and a three-second kickstand hold on the other. Both can be appropriate.

    New, pronounced, or worsening weakness on one side should be medically assessed, particularly when it is accompanied by numbness, foot dragging, speech changes, facial drooping, or difficulty walking.

    A Five-Minute Starter Routine

    During the first week, practise:

    1. Centred standing
    2. Side-to-side weight shifts
    3. Kickstand holds
    4. Low supported marching
    5. Forward toe taps

    Complete one set two or three times during the week.

    Once these movements feel familiar, add the one-centimetre foot hover, side taps, and clock taps.

    Balance activity should be challenging enough to require attention while remaining safe enough to repeat consistently. Official older-adult guidance recommends using suitable support during balance exercises and adjusting activity to personal ability. citeturn176605search0turn176605search11

    How to Progress Safely

    Change only one element at a time.

    You might:

    • Add one or two seconds to a hold
    • Complete two additional repetitions
    • Use lighter hand pressure
    • Lift the foot slightly higher
    • Move the tapping foot a little farther
    • Pause longer during marching
    • Perform one additional set

    Do not increase the hold, reduce support, and enlarge the movement simultaneously.

    Avoid closing your eyes, standing on cushions, or using unstable equipment. These variations remove useful sensory information and can sharply increase the risk of losing balance.

    More difficult does not automatically mean more beneficial.

    When to Stop and Seek Advice

    Stop exercising if you experience chest pain, faintness, severe breathlessness, sudden dizziness, new numbness, unusual weakness, severe pain, confusion, or a feeling that you are about to fall.

    Arrange an appropriate assessment if you fall repeatedly, your balance worsens suddenly, one leg repeatedly gives way, or you regularly experience spinning sensations.

    Single-leg practice can strengthen useful balance skills, but it cannot diagnose the cause of unsteadiness. Personalised exercises may be needed when balance problems involve health conditions, sensation, vision, medicines, or the inner ear. citeturn176605search9

    Let the Chair Stay Beside You

    The chair does not need to disappear for progress to occur.

    You may first notice that your grip becomes lighter. Later, your raised foot may remain off the floor for an extra second. Eventually, marching, stepping over a threshold, or putting on clothing may feel more controlled.

    These small improvements are the real purpose of the exercise.

    Supported single-leg practice is not about balancing perfectly. It is about teaching one leg to carry you safely while the other prepares for its next step.

    Begin with both hands on the chair. Lift the foot only as far as necessary. Let confidence grow one controlled second at a time.

    Frequently Asked Questions

    1. Is supported single-leg balance safe for beginners?

    It may be appropriate when the person can stand safely while holding a stable chair or fixed surface. Begin with weight shifts and toe-supported kickstand holds before lifting the foot. Someone should remain nearby when safety is uncertain.

    2. How high should I lift my foot?

    One or two centimetres is enough. Lifting the knee high does not necessarily improve the balance challenge and may make the movement harder to control.

    3. How long should I balance on each leg?

    Begin with three to five seconds. Gradually work towards longer holds only when posture remains controlled and the supporting leg does not buckle, roll, or shake strongly.

    4. Is it acceptable to hold the chair throughout?

    Yes. The chair is a safety and training tool. Some people may continue using both hands, while others gradually progress to lighter fingertip contact.

    5. Why is one leg less steady?

    Differences may relate to dominance, strength, stiffness, pain, previous injury, sensation, or other factors. Use more support on the less steady side. New or worsening one-sided weakness requires medical assessment.

    6. Should the supporting knee be locked?

    No. Keep it softly relaxed. A rigidly locked knee may make the exercise feel uncomfortable and reduce the body’s ability to make small adjustments.

    7. What should I do if my ankle wobbles?

    Lower the raised foot, widen your stance, and return to a kickstand hold. Some ankle movement is normal, but repeated rolling or a feeling that the ankle may give way should be assessed appropriately.

    8. Can single-leg exercises prevent every fall?

    No. They may improve one aspect of balance, but falls can also involve strength, vision, sensation, medicines, blood pressure, footwear, health conditions, fatigue, and environmental hazards.

    Free Tai Chi Walking: Fall‑Prevention Edition Printables

    Free Tai Chi Walking: Fall‑Prevention Edition Printables

    Get Your Copy Today
  • The Narrow-Step Path to Better Balance

    The Narrow-Step Path to Better Balance

    Margaret could walk across her living room without difficulty. Ask her to place one foot directly in front of the other, however, and the room suddenly seemed much smaller.

    Her ankles wobbled. Her shoulders tightened. Her hand reached quickly for the nearest chair.

    She assumed this meant her balance was poor. In reality, she had simply changed the rules beneath her feet.

    During normal standing, the feet create a wide base that helps keep the body stable. Heel-to-toe practice narrows that base. The ankles, hips, trunk, eyes, and brain must work harder to keep the body controlled. That makes heel-to-toe movement useful for balance training, but it also means beginners should approach it gradually.

    A heel-to-toe beginner balance routine should not begin with unsupported tightrope walking across an open room. It should begin beside a secure surface, using wider foot positions and short holds. Only after those stages feel manageable should the feet move closer to a true heel-to-toe position.

    The goal is not to look perfectly steady. It is to help the body become more comfortable controlling narrow steps, changing weight between the feet, and recovering from small wobbles.

    What Is Heel-to-Toe Balance Practice?

    In a true heel-to-toe position, the heel of the front foot is placed directly in front of, or very close to, the toes of the back foot.

    This creates a narrow base of support. There is less space beneath the body from side to side, so even a small sideways movement requires a quick correction.

    Heel-to-toe walking repeats this position step after step. It is sometimes described as walking along an imaginary line.

    For beginners, however, the feet do not need to touch.

    A safer progression begins with a staggered stance, where one foot is slightly ahead of the other but the feet remain separated sideways. The gap can gradually become narrower as balance improves.

    Heel-to-toe walking is recognised as a balance activity for older adults, but secure support should remain nearby when needed. Balance exercise is most useful as one part of a wider routine that also includes appropriate strengthening and general physical activity. citeturn188106search2turn188106search7

    Why Narrow-Step Practice Can Help

    Walking is not simply a matter of moving the legs forward.

    Before each step, your weight must transfer onto one leg. The other foot becomes lighter, leaves the ground, travels forward, and accepts your weight again.

    Your ankles make small adjustments. Your hips help keep the pelvis controlled. Your trunk keeps the upper body positioned over the feet. Your eyes and inner ears provide information about direction and movement.

    Heel-to-toe practice increases the challenge by narrowing the area beneath you. It may help you practise:

    • Transferring weight between the legs
    • Controlling side-to-side movement
    • Placing the feet more deliberately
    • Maintaining upright posture
    • Taking slower, more accurate steps
    • Recovering from mild, controlled wobbles
    • Moving through narrow spaces more confidently

    It cannot guarantee that you will never fall. Fall risk may also be influenced by strength, eyesight, sensation, medicines, blood pressure, footwear, health conditions, fatigue, and hazards in the home.

    Know When Heel-to-Toe Practice Is Too Advanced

    A true heel-to-toe stance is not the correct starting point for everyone.

    Begin with easier supported exercises if you:

    • Cannot stand safely without holding furniture
    • Have fallen recently
    • Experience frequent dizziness
    • Have one leg that repeatedly gives way
    • Need physical help to remain upright
    • Have severe foot, ankle, knee, hip, or back pain
    • Become frightened when your feet are close together
    • Cannot recover from a small wobble

    There is no benefit in forcing the narrowest position before your body is ready.

    A staggered stance with space between the feet may provide enough challenge. Some older adults may continue using that version rather than progressing to full heel-to-toe walking.

    Seek an appropriate medical assessment if your balance has changed suddenly, you fall repeatedly, you experience persistent spinning sensations, or you have new weakness, numbness, or difficulty walking. Balance problems can have causes that require more than exercise. citeturn188106search13

    Prepare a Safe Practice Area

    Choose a firm, dry floor with good lighting.

    Practise beside a fixed kitchen bench, sturdy handrail, or solid row of furniture that will not move when touched. A secure surface running alongside you is often more useful than a single chair because it remains within reach as you step forward.

    Do not use:

    • A chair with wheels
    • A lightweight table
    • A folding chair
    • A towel rail
    • A movable trolley
    • Furniture that slides or tips

    Clear loose rugs, electrical cords, shoes, bags, pet toys, and other obstacles from the area.

    Wear supportive, well-fitting footwear with nonslip soles. Loose slippers and socks on a smooth floor may increase slipping risk.

    Keep another chair nearby for rest. Someone should remain close if you have recently fallen or are uncertain whether you can complete the routine safely.

    The Heel-to-Toe Beginner Balance Routine

    Move slowly and breathe normally. Begin with one set of each exercise.

    Use both hands for support initially. Progress to one hand or lighter fingertip contact only when the movement feels controlled.

    1. Centred Standing

    Stand beside the bench with your feet approximately hip-width apart.

    Rest both hands lightly on the support. Keep your knees soft, relax your shoulders, and look ahead.

    Notice how your weight is distributed across your feet. Try to feel the heels, the balls of the feet, and the toes contacting the floor.

    Take five slow breaths.

    Hold for 20 to 30 seconds.

    This comfortable stance gives you a stable position to return to between exercises.

    2. Feet-Together Standing

    Bring your feet slightly closer together.

    They do not need to touch. Leave enough space to feel secure.

    Hold the support and remain upright for 10 to 20 seconds.

    Notice whether your body begins moving more from side to side. Keep your knees relaxed and avoid gripping the floor tightly with your toes.

    Repeat twice.

    Bringing the feet closer together narrows your base without yet asking you to place one foot ahead of the other.

    3. Wide Staggered Stance

    Move your right foot a short distance forward.

    Keep the feet separated sideways by approximately the width of your hips. Both feet should point generally ahead.

    Hold for 15 to 20 seconds, then change which foot is in front.

    Complete two holds on each side.

    This position resembles the shape of a walking step while preserving a relatively wide base.

    If it feels easy, reduce the sideways gap slightly during the next session. Do not narrow it while you are already struggling.

    4. Staggered Weight Shifts

    Return to the wide staggered position with the right foot forward.

    Slowly move a little more weight onto the front foot. Pause, then move your weight back towards the rear foot.

    Keep both feet on the floor.

    Repeat six to ten times, then change which foot is in front.

    Keep the movement small. Your body should travel forward and backwards rather than bending at the waist.

    This exercise practises the weight transfer that occurs during walking.

    5. Half-Tandem Hold

    Place the right foot slightly ahead of the left. Move it inward so the heel of the front foot is approximately beside the toes of the back foot rather than directly in front of them.

    This is sometimes called a half-tandem position.

    Hold the support and remain in place for 10 to 20 seconds.

    Change sides and repeat.

    Complete two holds with each foot in front.

    If the position feels unstable, move the front foot farther sideways. If it feels controlled, use lighter hand pressure.

    6. Supported Heel-to-Toe Hold

    Place the right foot directly or almost directly in front of the left.

    The heel of the front foot may touch the toes of the back foot, but contact is not required.

    Hold the bench securely and look forward.

    Maintain the position for five to ten seconds, then step the feet apart.

    Change which foot is in front.

    Complete two or three holds per side.

    Do not force the feet into a perfectly straight line. A small sideways gap is acceptable and may be much safer.

    Lower the difficulty immediately if your ankle rolls, your knees buckle, or you need to pull heavily on the support.

    7. Heel-to-Toe Rocking

    Stand in a comfortable staggered or half-tandem position.

    Move a little more weight onto the front foot, then return towards the back foot.

    Repeat six to eight times before changing sides.

    Keep both feet flat and your hands supported.

    This movement teaches you to control weight transfer while using a narrower stance. It also prepares you for stepping forward.

    8. One-Step Heel-to-Toe Placement

    Stand beside the support with your feet in a comfortable position.

    Shift your weight onto the left leg. Move the right foot forward and place its heel near the toes of the left foot.

    Pause for two seconds.

    Step the right foot back to the starting position.

    Repeat five times, then practise with the left foot moving forward.

    The goal is accurate placement, not speed. Look down briefly when necessary, then return your gaze forward.

    9. Two-Step Heel-to-Toe Walk

    Hold the bench with one or both hands.

    Take one heel-to-toe step forward. Pause until you feel steady.

    Take a second step, then stop. Move your feet apart before turning or returning to the starting position.

    Repeat three to five times.

    Do not attempt a long line of steps immediately. Two controlled steps are enough for a beginner session.

    Turn through several small, ordinary steps rather than trying to pivot while your feet remain on a narrow line.

    10. Supported Heel-to-Toe Walk

    Once two steps feel manageable, practise four to six slow steps alongside the bench.

    Place the heel of each advancing foot near the toes of the foot behind it. The feet may remain slightly separated sideways.

    Pause whenever necessary.

    Keep your steps short and your body upright. Avoid staring continuously at the floor, but glance down when checking placement.

    After completing the steps, move your feet apart, stop, and regain a stable position before turning around.

    Heel-to-toe walking is intended to challenge balance. It should not be continued when fatigue causes inaccurate foot placement or heavy reliance on the support.

    A Simple First-Week Plan

    During the first week, practise only:

    1. Centred standing
    2. Feet-together standing
    3. Wide staggered holds
    4. Staggered weight shifts
    5. Half-tandem holds

    Complete one set on two or three days.

    During the second week, add supported heel-to-toe holds and one-step placement.

    Attempt continuous heel-to-toe walking only when the earlier exercises feel controlled.

    The safest progression is gradual. Moving directly from ordinary standing to a long unsupported heel-to-toe walk may create more risk than benefit.

    Common Mistakes to Avoid

    Making the Line Too Narrow

    Your feet do not need to touch.

    A small sideways gap still creates a useful balance challenge. Begin wider and narrow the position over time.

    Looking Down the Entire Time

    You may need to glance at your feet, but constantly bending your head can affect posture and awareness of the space ahead.

    Look forward whenever your feet are safely placed.

    Taking Steps Too Quickly

    Speed can hide poor control.

    Pause after each step and allow your weight to settle before moving again.

    Crossing the Feet

    Heel-to-toe walking places one foot in front of the other. It does not require crossing one foot over the body’s centre.

    Crossing may increase instability.

    Locking the Knees

    Keep the knees softly relaxed. Rigid legs may make it harder for the body to make small balance corrections.

    Continuing After Fatigue

    Stop when the legs begin shaking, the feet land unpredictably, or you need to grip the support tightly.

    Practising poor-quality steps does not improve balance more quickly.

    How to Progress Safely

    Change only one feature at a time.

    You might:

    • Hold a stance five seconds longer
    • Add one or two steps
    • Reduce the sideways gap slightly
    • Pause longer after each step
    • Use lighter hand pressure
    • Move more slowly
    • Complete one additional repetition

    Do not narrow the stance, remove support, and increase the number of steps simultaneously.

    Avoid closing your eyes, walking backwards heel to toe, or practising on cushions and unstable surfaces. These variations may be inappropriate for beginners and can significantly increase fall risk.

    Progress can also mean feeling calmer, placing the feet more accurately, or recovering from a wobble more smoothly.

    Combine Heel-to-Toe Work With Strengthening

    Heel-to-toe practice challenges balance, but the body also needs enough strength to respond.

    A broader routine may include supported heel raises, toe raises, low marching, side taps, and controlled sit-to-stands.

    Older adults are generally advised to include a mixture of balance, muscle-strengthening, and aerobic activities because each supports a different part of physical function. Strength and balance exercise also form part of wider fall-prevention guidance. citeturn188106search0turn188106search7

    Begin with short sessions and allow rest between more demanding exercises.

    When to Stop Exercising

    Stop immediately if you experience:

    • Chest pain
    • Faintness
    • Sudden dizziness
    • Severe breathlessness
    • New weakness or numbness
    • Sharp or increasing pain
    • Sudden confusion
    • Loss of vision
    • A feeling that you are about to fall

    Seek urgent medical help for sudden facial drooping, difficulty speaking, one-sided weakness, fainting, or a sudden severe headache.

    Do not continue simply to finish the planned number of steps.

    Let the Line Widen When Needed

    Some days will feel steadier than others.

    Fatigue, poor sleep, pain, illness, stress, dehydration, and changes in medication may affect balance. On a difficult day, return to the wider staggered stance or use both hands throughout.

    This is not losing progress. It is adjusting the challenge intelligently.

    The purpose of heel-to-toe practice is not to prove that you can walk along the narrowest possible line. It is to improve control that may carry into ordinary walking, turning, and navigating confined spaces.

    Begin wide. Use support. Take one careful step at a time.

    Frequently Asked Questions

    1. What is the easiest heel-to-toe exercise for beginners?

    A wide staggered stance is usually easier than true heel-to-toe standing. Place one foot slightly forward while keeping the feet separated sideways. Hold a secure support and gradually narrow the stance as control improves.

    2. Do the heel and toes have to touch?

    No. A small gap is acceptable and often safer. The feet can remain slightly separated from side to side while still creating a useful balance challenge.

    3. How many heel-to-toe steps should a beginner take?

    Begin with one or two supported steps. Pause after each one. Gradually increase to four or six steps only when foot placement remains controlled.

    4. How often should I practise?

    Two or three short sessions per week can be a manageable starting point. Stop before fatigue affects your posture or foot placement.

    5. Should I hold a bench or chair?

    Yes. Use a secure surface that remains within reach as you move. A fixed bench or rail may be more practical than a single chair for walking exercises.

    6. What if one foot is harder to place in front?

    Use a wider stance and more hand support on that side. Differences may relate to strength, stiffness, pain, sensation, or previous injury. New or worsening one-sided difficulty should be medically assessed.

    7. Is wobbling normal during heel-to-toe practice?

    A small, controlled wobble may occur because the narrow stance is challenging. Step your feet apart if the movement becomes large, your knees buckle, or you cannot recover immediately.

    8. Can heel-to-toe walking prevent every fall?

    No. It may improve one aspect of balance, but falls can also involve strength, eyesight, sensation, medicines, blood pressure, footwear, fatigue, health conditions, and environmental hazards.

    Free Tai Chi Walking: Fall‑Prevention Edition Printables

    Free Tai Chi Walking: Fall‑Prevention Edition Printables

    Get Your Copy Today
  • Upright and Steady: A Gentle Routine for Seniors

    Upright and Steady: A Gentle Routine for Seniors

    Dorothy did not think she had a posture problem.

    She simply noticed that walking seemed to require more effort. By late afternoon, her shoulders were rounded, her eyes were fixed on the floor, and her steps had become shorter. When she stood from a chair, she remained slightly bent forward for several seconds before feeling ready to move.

    Nothing had changed dramatically. Her body had simply adapted to years of sitting, cautious walking, stiff joints, and looking down whenever the ground felt uncertain.

    Posture and balance are closely connected, but good posture does not mean standing rigidly with the shoulders pulled back and the chest forced upward. It means arranging the body so that the head, trunk, hips, and feet can work together without unnecessary tension.

    A gentle posture and balance routine for seniors can help make everyday movements feel more organised. The exercises do not require difficult poses or perfect flexibility. They begin with comfortable seated awareness and progress to supported standing, weight shifting, reaching, and stepping.

    The goal is not to create a military stance. It is to help you feel upright enough to see where you are going, move your weight safely, and respond when your balance changes.

    How Posture Influences Balance

    Balance depends on several systems working together.

    Your eyes provide information about your surroundings. Your inner ears detect movement and changes in head position. Sensory nerves report what is happening beneath your feet and around your joints. Your brain processes those signals while your muscles make constant adjustments.

    Posture affects how efficiently these adjustments can happen.

    When the head remains far forward, the upper back rounds, or the body leans heavily towards one side, the muscles may need to work harder to keep the body centred. Looking continuously at the floor can also reduce awareness of obstacles farther ahead.

    However, forcing yourself into an uncomfortable position is not the answer. A rigid body may have more difficulty responding naturally to a wobble.

    Useful posture is relaxed, adaptable, and appropriate for your body. The knees remain softly relaxed, the shoulders are comfortable, and the head is positioned so you can look ahead without straining the neck.

    Regular activity that combines balance and muscle strengthening can help older adults maintain function and reduce fall risk. citeturn638077search0turn638077search3

    Why Posture May Change With Age

    Many factors can influence the way an older adult stands and moves.

    Joint stiffness may make it harder to straighten fully after sitting. Reduced strength around the hips, legs, abdomen, and back can make an upright position tiring. Changes in eyesight may encourage looking down, while fear of falling may lead to shorter steps and a forward-leaning stance.

    Long periods spent reading, watching television, using devices, or resting can also encourage the body to remain in one position.

    Postural changes are not always caused by habit. Pain, bone or joint conditions, previous injuries, nerve problems, and other medical issues may affect how a person stands. A general routine cannot diagnose or correct every cause.

    The aim of these exercises is not to force the spine into a shape it no longer has. It is to help you find the most comfortable, functional position available to you.

    Prepare a Safe Exercise Space

    Choose a firm, level floor in a well-lit room.

    Use a sturdy chair without wheels. It should not rock, fold unexpectedly, or slide when you touch it. Position the chair against a wall whenever possible.

    Remove loose rugs, electrical cords, bags, shoes, pet toys, and other objects from the exercise area. Wear secure, comfortable footwear with nonslip soles rather than loose slippers or socks on a smooth floor.

    Keep another chair nearby for rest.

    Someone should remain with you if you have fallen recently, require physical assistance to stand, or are unsure whether you could recover from a wobble.

    Begin with both hands on the support during standing exercises. Using a chair is not a sign that you are doing the routine incorrectly. It allows you to practise alignment and movement without turning every exercise into a fall risk.

    The Gentle Posture and Balance Routine

    Move slowly and breathe normally. One set of each exercise is enough for a beginner.

    The complete routine may take approximately 10 to 15 minutes. It can also be divided into shorter seated and standing sessions.

    1. Seated Posture Reset

    Sit in a firm chair with both feet flat on the floor.

    Move slightly forward from the backrest if this feels comfortable. Rest your hands on your thighs.

    Imagine the top of your head gently rising. Keep your chin level and allow your shoulders to relax away from your ears.

    Do not force the lower back into an exaggerated arch. Find a position that feels upright but not stiff.

    Take five slow breaths.

    Notice whether you are leaning onto one hip. Try to distribute your weight evenly through both sides of the pelvis and both feet.

    Hold for 20 to 30 seconds.

    This exercise helps you recognise a comfortable centred position before adding movement.

    2. Gentle Shoulder Release

    Remain seated with your arms relaxed.

    Slowly lift your shoulders towards your ears. Move them gently backwards and allow them to settle down.

    Repeat five times.

    Next, let your arms hang naturally and gently turn your palms forward. Hold for two breaths, then relax.

    Avoid pulling the shoulders forcefully backwards. The movement should reduce tension rather than create it.

    Freeing the shoulders may make it easier to stand upright and move the arms naturally while walking.

    3. Seated Pelvic Rocking

    Keep both feet firmly planted.

    Slowly tilt your pelvis forward a small amount, allowing the lower back to arch gently. Return to the middle.

    Next, tilt the pelvis backwards slightly, allowing the lower back to round.

    Repeat six to ten times.

    The movement should be small and comfortable. Avoid forcing the back into either position.

    Pelvic rocking helps you explore the middle position between excessive rounding and excessive arching.

    4. Seated Side Shifts

    Sit tall with both feet on the floor.

    Move your upper body slightly towards the right without lifting the opposite hip. Return to the centre and move towards the left.

    Complete six to eight shifts in each direction.

    Keep the movement controlled. Imagine your ribs moving over one hip rather than collapsing sideways.

    This introduces the weight transfers you will later practise while standing.

    5. Comfortable Standing Alignment

    Stand behind the chair with your feet approximately hip-width apart.

    Hold the chair with both hands. Keep your knees softly relaxed and look forward.

    Allow your weight to spread across the heels, the balls of the feet, and the toes. Avoid leaning heavily through your arms.

    Imagine your ribs resting comfortably over your hips and your head floating above your shoulders.

    Hold for 20 to 30 seconds.

    There is no need to straighten every curve in your spine. Find a position that feels tall, comfortable, and sustainable.

    6. Side-to-Side Weight Shifts

    Keep both feet on the floor.

    Slowly transfer more of your weight onto your right foot. Pause, return to the centre, and move towards the left.

    Complete eight to ten shifts in each direction.

    Keep your head and chest facing forward. Avoid bending dramatically at the waist.

    As you move over one foot, notice the other foot becoming lighter. This is the beginning of the weight transfer used during walking.

    7. Forward and Back Weight Shifts

    Stand with your feet comfortably apart.

    Move your weight slightly towards the balls of your feet without lifting your heels. Return to the middle.

    Shift gently towards your heels without lifting your toes.

    Repeat eight to ten times.

    Keep the movement small and allow it to occur mainly around the ankles. Avoid bending forward or arching backwards.

    This exercise helps the body practise moving away from its centred position and returning safely.

    8. Supported Heel Raises

    Hold the chair and slowly lift both heels.

    Pause briefly on the balls of your feet, then lower the heels with control.

    Complete six to twelve repetitions.

    Keep your body tall rather than pushing your hips towards the chair. Avoid allowing the ankles to roll outward.

    If raising both heels is difficult, lift one heel at a time.

    Heel raises strengthen the calf muscles and encourage the ankles to make controlled adjustments during standing and walking.

    9. Low Supported Marching

    Stand tall behind the chair.

    Move your weight onto the left leg and lift the right foot one or two centimetres. Place it down completely before lifting the left foot.

    Continue for 10 to 20 alternating steps.

    Keep the knees low and the shoulders relaxed. Try not to lean sharply towards the supporting side.

    Look forward rather than staring continuously at your feet. Glance down when necessary to check placement, then raise your gaze again.

    If lifting a foot feels unsafe, lift only the heel while keeping the toes on the floor.

    10. Supported Reach and Return

    Stand beside or behind the chair with one hand securely supported.

    Reach the free hand forward a short distance, then bring it back.

    Next, reach slightly to the side and return.

    Complete four to six reaches in each direction before changing arms.

    Keep both feet on the floor. Move only far enough that you can return without grabbing suddenly or stepping unexpectedly.

    This exercise helps the trunk remain controlled while the arm moves away from the body, a skill used when reaching into cupboards or across a table.

    11. Staggered Stance Hold

    Place your right foot slightly in front of the left, as though you have paused during a walking step.

    Keep space between the feet from side to side. Do not place one foot directly in front of the other.

    Hold the chair and remain in this position for 10 to 20 seconds.

    Change which foot is in front and repeat.

    Complete two holds on each side.

    A staggered stance narrows the base beneath you and asks the ankles, hips, and trunk to work together. Widen your feet whenever you need more stability.

    12. Small-Step Turns

    Stand behind the chair with both hands available for support.

    Take several small steps to turn slightly towards the right. Return to the centre, then turn towards the left.

    Repeat three to five times in each direction.

    Let your feet move with your body. Avoid planting the feet and twisting sharply through the knees or back.

    Turning through several small steps can be more controlled than trying to pivot quickly.

    13. Posture-to-Walking Practice

    Walk slowly along a clear indoor route using your normal walking support when one has been recommended.

    Focus on one cue only:

    • Look several steps ahead.
    • Relax your shoulders.
    • Allow your arms to move naturally.
    • Lift your feet rather than shuffling.
    • Keep your steps comfortable rather than forcing them longer.

    Trying to correct every part of your posture at once can make walking feel tense and unnatural.

    Walk for one or two minutes, then rest. Stop before fatigue causes you to lean farther forward or drag your feet.

    14. Controlled Sit-to-Stand

    Sit towards the front of a firm chair that cannot slide.

    Place your feet flat and slightly behind your knees. Lean forward from the hips until your chest moves over your feet.

    Press through your legs and use the armrests or chair seat if needed to stand.

    Pause until you feel steady. Allow your body to lengthen into a comfortable upright position without leaning backwards.

    Push your hips towards the chair and lower yourself slowly.

    Complete three to eight repetitions.

    This exercise develops strength and practises the transition from a forward-leaning position into upright standing.

    A Five-Minute Version for Busy or Tired Days

    You do not need to complete every exercise during every session.

    A shorter routine may include:

    1. Seated posture reset
    2. Pelvic rocking
    3. Comfortable standing alignment
    4. Side-to-side weight shifts
    5. Supported marching
    6. Two or three sit-to-stands

    Practise for approximately five minutes and stop before your legs or back become tired.

    Older adults with reduced mobility are encouraged to perform balance-focused activity regularly, while remaining as active as their health and abilities allow. citeturn638077search1

    Posture Cues That Can Cause Problems

    Some traditional posture advice can create unnecessary strain.

    “Pull Your Shoulders Back”

    Forcefully squeezing the shoulder blades may tighten the upper body and become tiring. Allow the shoulders to rest comfortably instead.

    “Stand Completely Straight”

    Natural spines have curves, and age-related changes may alter their shape. Aim for comfortable alignment rather than forcing yourself into a rigid position.

    “Keep Your Stomach Tight”

    Holding the abdomen tightly throughout the routine may interfere with breathing. Gentle muscular support is useful, but you should still be able to breathe normally.

    “Never Look Down”

    Looking at the ground is necessary near steps, obstacles, and uneven surfaces. The aim is to avoid staring at your feet continuously when the route ahead is clear.

    “Push Through the Discomfort”

    Balance exercises should not cause sharp or increasing pain. Reduce the movement, use more support, or stop when symptoms worsen.

    How to Progress Safely

    Change only one part of the routine at a time.

    You might:

    • Add two repetitions.
    • Hold a position five seconds longer.
    • Move more slowly.
    • Use slightly less pressure through your hands.
    • Take a marginally wider step.
    • Reach a few centimetres farther.
    • Walk for one additional minute.

    Avoid closing your eyes, standing on cushions, or using unstable furniture. These variations can sharply increase the balance challenge and may be unsafe for beginners.

    Progress may also mean less gripping, smoother turns, easier breathing, or a more comfortable walking position. It does not require perfect posture or unsupported exercise.

    When to Stop and Seek Advice

    Stop exercising if you experience chest pain, faintness, severe breathlessness, sudden dizziness, new weakness or numbness, severe pain, confusion, sudden vision changes, or a feeling that you are about to fall.

    Seek urgent medical help for sudden facial drooping, difficulty speaking, one-sided weakness, fainting, or a sudden severe headache.

    Arrange an appropriate assessment if your posture changes suddenly, you begin falling repeatedly, one leg repeatedly gives way, or you develop persistent dizziness or difficulty walking.

    Balance problems may involve vision, hearing, blood pressure, medicines, nerves, joints, muscles, or other health factors. New symptoms should not simply be exercised through. citeturn638077search5

    Let Comfortable Posture Guide You

    The first sign of progress may not appear during the routine.

    You may notice that you look ahead more naturally while walking. Perhaps you rise from a chair without remaining bent forward, or you reach into a cupboard without immediately grabbing the bench.

    These small changes matter.

    Useful posture does not require standing perfectly straight. It allows the body to move, breathe, and respond. Combined with gentle balance practice, it can help ordinary activities feel less awkward and more controlled.

    Begin with the chair beside you. Relax rather than stiffen. Let your body find a position from which movement feels possible.

    Frequently Asked Questions

    1. Can posture exercises improve balance?

    Posture exercises may help you recognise a more centred and comfortable body position. Balance also depends on strength, sensation, eyesight, the inner ears, and other factors, so posture work is most useful when combined with balance and strengthening activities.

    2. Should seniors try to stand completely straight?

    No. Natural spinal curves and age-related changes vary between individuals. Aim for a comfortable upright position that allows normal breathing and movement rather than forcing the body into a rigid shape.

    3. How often should the routine be performed?

    Two or three sessions per week can be a practical starting point. Gentle posture resets and seated movements may be performed more frequently when they do not increase pain, dizziness, or fatigue.

    4. How long should a beginner session last?

    Five to fifteen minutes may be enough. Stop before tiredness affects your posture, breathing, concentration, or foot placement.

    5. Is it acceptable to hold a chair throughout?

    Yes. A sturdy chair provides useful support. Use both hands until you can perform the movement without leaning heavily, gripping tightly, or losing control.

    6. Should I look down while balancing?

    Glance down when checking foot placement or approaching an obstacle. When the floor is clear, look several steps ahead to support a more natural head position and awareness of your surroundings.

    7. What if standing upright causes pain?

    Do not force the position. Return to a comfortable posture and reduce the exercise. New, severe, or worsening pain should be assessed appropriately.

    8. Can posture and balance exercises prevent every fall?

    No exercise can prevent every fall. These exercises may improve movement control and confidence, but fall risk can also be influenced by eyesight, medicines, blood pressure, footwear, sensation, fatigue, health conditions, and environmental hazards.

    Free Tai Chi Walking: Fall‑Prevention Edition Printables

    Free Tai Chi Walking: Fall‑Prevention Edition Printables

    Get Your Copy Today
  • Move With Less Strain: Gentle Balance Exercises for Arthritis

    Move With Less Strain: Gentle Balance Exercises for Arthritis

    Arthritis can make an ordinary morning feel unpredictable.

    One day, you may stand from bed with only mild stiffness. The next, your knee objects to the first step, your hands dislike gripping the stair rail, or your hip takes several minutes to loosen. When discomfort changes from day to day, balance can feel different too.

    This uncertainty often leads to caution. You may shorten your steps, avoid placing weight through one side, or reach for furniture whenever you turn. These adjustments can be sensible in the moment, but consistently avoiding movement may gradually reduce strength, coordination, and confidence.

    Beginner balance exercises for seniors with arthritis offer a gentler alternative. Rather than forcing painful joints through difficult poses, the routine uses stable support, comfortable movement ranges, and slow weight transfers.

    Physical activity can improve function, mood, and quality of life for adults with arthritis. Older adults are also encouraged to combine balance activities with appropriate aerobic and muscle-strengthening exercise. citeturn500399search0turn500399search44

    The aim is not to exercise as though arthritis does not exist. It is to keep moving in a way that respects the joints while helping the body remain capable.

    How Arthritis Can Affect Balance

    Balance depends on much more than strong legs.

    Your eyes help identify your position and surrounding hazards. Your inner ears detect motion. Sensory nerves provide information from the feet, joints, and muscles. Your brain then directs the body to make constant corrections.

    Arthritis can interfere with this process in several ways.

    A painful knee may encourage you to place more weight through the other leg. A stiff ankle may make it harder to adjust when the body sways. Sore feet can change the way you step, while hip discomfort may shorten your stride.

    Pain can also make movement tense and guarded. Instead of shifting smoothly, you may move suddenly or keep your entire body rigid. This may feel protective, but it can reduce the body’s ability to respond naturally to small changes in position.

    Arthritis has been associated with factors that can increase fall risk, including changes in walking and balance. Exercise that improves strength and coordination can form one part of reducing that risk. citeturn500399search2turn500399search11

    Arthritis Is Not One Single Condition

    The word arthritis describes many conditions that can affect joints and surrounding tissues.

    One person may have long-term stiffness in the knees. Another may have painful hands, an inflamed foot, or several joints that behave differently. Symptoms may include pain, stiffness, swelling, warmth, weakness, or reduced movement.

    Because arthritis varies, no single routine is appropriate for everyone.

    Seek personalised advice before starting when you have recently had joint surgery, cannot safely bear weight, or have been advised to restrict activity. An individual assessment is also sensible when your balance has changed significantly or you need another person to keep you upright.

    Do not exercise a joint through severe pain, sudden swelling, unusual heat, marked redness, locking, or repeated giving way. Symptoms that follow an injury or are accompanied by fever also need appropriate attention.

    Choose the Right Time to Exercise

    Many people with arthritis have times of day when movement feels easier.

    Your joints may be particularly stiff after waking or after sitting for several hours. Rather than beginning balance exercises immediately, spend a few minutes moving gently and allow the body to warm up.

    On a relatively comfortable day, you may complete the entire routine. During a flare or more painful period, seated movements and short supported holds may be more appropriate.

    A simple rule is to adjust the exercise to the joint rather than forcing the joint to match the exercise.

    Movement should feel controlled. Mild muscular effort is expected, but sharp pain, increasing joint pain, or worsening instability means the activity should be reduced or stopped.

    Prepare a Joint-Friendly Exercise Space

    Choose a flat, dry floor with good lighting.

    Use a sturdy chair without wheels. It should not rock, fold, or slide when pressure is applied. Place it against a wall for additional security.

    Remove potential trip hazards, including:

    • Loose rugs
    • Electrical cords
    • Shoes and bags
    • Pet toys
    • Low furniture
    • Wet patches
    • Clutter around your feet

    Wear secure, well-fitting footwear with nonslip soles. Cushioned footwear may feel more comfortable for some people, but the foot should not slide inside the shoe.

    Keep a second chair nearby for rest.

    If arthritis affects the hands, gripping a narrow chair back may be uncomfortable. A broad, secure surface such as a fixed bench may allow you to rest the palms or forearms without squeezing tightly.

    Begin With a Seated Warm-Up

    A seated warm-up can reduce the shock of moving directly from rest into standing.

    Sit in a firm chair with both feet supported.

    1. Seated Posture Reset

    Sit slightly forward from the backrest if comfortable.

    Relax your shoulders and look ahead. Imagine the top of your head gently rising while both feet remain firmly placed.

    Take five slow breaths.

    Notice whether you are leaning away from a painful hip or knee. Move towards the centre only as far as comfort allows.

    Hold for 20 to 30 seconds.

    The goal is not perfect symmetry. It is a comfortable, controlled starting position.

    2. Ankle Pumps

    Keep your heels down and lift the toes.

    Lower the toes, then lift the heels while keeping the toes on the floor.

    Repeat eight to twelve times.

    Move through a comfortable range. Avoid forcing a stiff ankle or pressing through sharp foot pain.

    The ankles contribute to the small adjustments used during standing, so gentle movement here prepares them for later exercises.

    3. Gentle Knee Straightening

    Slowly straighten your right knee until the lower leg moves forward.

    Pause briefly, then lower the foot.

    Repeat five to eight times and change legs.

    The knee does not need to straighten completely. Use a comfortable range and avoid snapping the joint into position.

    4. Seated Marching

    Lift the right foot slightly, lower it, and then lift the left.

    Continue for 10 to 20 alternating repetitions.

    The foot may rise only a few centimetres. Keep the movement slow and avoid leaning sharply from one side to the other.

    A Beginner Balance Routine for Seniors With Arthritis

    Begin with both hands supported. Complete one set and rest whenever necessary.

    1. Comfortable Standing Hold

    Stand behind the chair with your feet approximately hip-width apart.

    Keep your knees softly relaxed rather than locked. Rest your hands on the support and look forward.

    Allow the legs to carry as much weight as they comfortably can without hanging heavily through your arms.

    Hold for 10 to 30 seconds.

    Sit and rest, then repeat once or twice.

    If standing increases discomfort quickly, shorten the hold. Several brief attempts can be more manageable than one long effort.

    2. Small Side-to-Side Weight Shifts

    Keep both feet on the floor.

    Slowly move a little more weight onto your right foot. Return to the middle, then shift towards the left.

    Complete six to ten shifts in each direction.

    Keep the movement small. Avoid bending sideways from the waist or allowing a knee to collapse inward.

    You do not need to place equal weight through both legs when one joint is irritated. Gradually explore a comfortable transfer without forcing the painful side.

    3. Forward and Back Weight Shifts

    Stand with both hands supported.

    Move your weight slightly towards the balls of your feet without lifting your heels. Return to the centre.

    Shift gently towards your heels without lifting your toes.

    Repeat six to ten times.

    Most of the movement should occur around the ankles. Avoid deep knee bending or leaning dramatically through the back.

    4. Alternating Heel Raises

    Lift your right heel while keeping the toes on the floor.

    Lower it slowly, then lift the left heel.

    Continue for 12 to 20 alternating repetitions.

    This movement transfers weight gently while keeping both feet partly connected to the ground.

    If the exercise irritates the toes, feet, or ankles, reduce the height or perform it while seated.

    5. Supported Foot Unweighting

    Shift a little more weight onto your left leg.

    Keep the toes of your right foot touching the floor, but make that foot lighter. Hold for three seconds and return to the centre.

    Repeat on the other side.

    Complete three to five attempts per leg.

    This kickstand position introduces single-leg support without requiring the foot to lift completely.

    Use more pressure through your hands when standing on a painful knee, hip, ankle, or foot.

    6. Side Toe Taps

    Move your weight towards the left leg.

    Tap the right foot a short distance to the side, then return it beneath you.

    Repeat five to eight times and change sides.

    The tapping foot can slide gently when lifting is uncomfortable, provided the floor and footwear allow safe movement.

    Keep the step small enough that you can return without pulling against the chair.

    7. Forward Heel Taps

    Move the right foot a short distance forward and touch the heel lightly to the floor.

    Return it to the starting position and repeat with the left foot.

    Continue for five to ten alternating taps.

    Avoid reaching far or bending the supporting knee deeply. Accurate placement matters more than distance.

    This exercise practises moving one foot while the other leg remains stable.

    8. Low Supported Marching

    Shift your weight onto the left leg and lift the right foot slightly.

    Place it down fully before lifting the left foot.

    Continue for 10 to 20 slow steps.

    Keep the lifts low. If raising the entire foot causes discomfort, lift only the heel while leaving the toes down.

    Avoid rushing. A slow march allows you to notice how each joint responds.

    9. Wide Staggered Stance

    Place your right foot slightly in front of the left.

    Keep the feet separated sideways rather than placing one directly in front of the other.

    Hold the chair and remain in this position for 10 to 20 seconds.

    Change which foot is in front and repeat.

    A wide stance is usually gentler and more stable than a tight heel-to-toe position. Shorten the step if the front knee or hip feels uncomfortable.

    10. Side Leg Slide

    Hold the chair and transfer your weight onto the left leg.

    Slide the right foot a short distance to the side. Return it slowly.

    Repeat five to eight times and change legs.

    Keep the toes facing forward and avoid leaning sharply.

    This movement engages muscles around the hips while allowing the moving foot to remain on the floor.

    11. Small-Step Turns

    Stand behind the chair with both hands ready for support.

    Take several small steps to turn slightly towards the right. Return to the centre and turn towards the left.

    Repeat three to five times in each direction.

    Avoid twisting sharply on a planted foot. Let the feet move with the rest of the body.

    Small-step turns can be useful when arthritis makes pivoting uncomfortable or uncertain.

    12. Assisted Sit-to-Stand

    Sit towards the front of a firm, reasonably high chair.

    Place your feet flat and slightly behind your knees. Lean forward from the hips until your chest moves over your feet.

    Press through your legs and use the armrests, seat, or thighs to assist yourself into standing.

    Pause until steady, then move your hips backwards and lower slowly.

    Complete three to eight repetitions.

    A higher chair requires less hip and knee bending than a low, soft seat.

    A partial lift is acceptable. Stop if the movement causes sharp pain, catching, or a feeling that a joint may give way.

    Appropriate strength training can help support joints, improve stability, and increase confidence. citeturn500399search7turn500399search19

    A Five-Minute Routine for Painful Days

    Some days are not suitable for the full routine.

    Try this shorter sequence:

    1. Seated ankle pumps
    2. Gentle knee straightening
    3. Comfortable standing holds
    4. Small side-to-side shifts
    5. Alternating heel raises
    6. Two or three assisted sit-to-stands

    Use a smaller movement range and additional hand support.

    Completing a shorter routine preserves the habit without demanding more than the joints can comfortably manage.

    How to Judge the Joint’s Response

    Pay attention during the exercises and later in the day.

    Mild muscular tiredness may be expected, particularly when returning to activity. The joints should not become sharply painful, increasingly swollen, or less stable.

    Reduce the routine when you notice:

    • Increasing pain with each repetition
    • New or greater swelling
    • Heat or redness
    • Catching or locking
    • A joint beginning to give way
    • A noticeably worse limp
    • Symptoms remaining substantially worse afterwards
    • Discomfort interfering with normal sleep or movement

    This does not always mean exercise must stop completely. You may need fewer repetitions, a smaller range, more support, or a different movement.

    Progress Without Forcing the Joints

    Progress does not require deeper bending or longer one-legged holds.

    You may progress by:

    • Adding two repetitions
    • Extending a comfortable hold by five seconds
    • Moving more slowly
    • Using lighter hand pressure
    • Taking a slightly wider tap
    • Completing one extra sit-to-stand
    • Practising more consistently

    Change only one part of the routine at a time.

    Avoid standing on cushions, closing your eyes, or using unstable equipment. These changes can increase fall risk and are unnecessary for a beginner routine.

    Progress may first appear as smoother movement, less fear, or easier transitions rather than a larger exercise range.

    Keep the Wider Picture in Mind

    Balance exercises are only one part of managing movement with arthritis.

    Regular physical activity can include joint-friendly aerobic exercise, muscle strengthening, flexibility work, and balance training. The most appropriate mixture depends on the joints affected, current symptoms, health, and mobility. citeturn500399search15turn500399search49

    Home safety matters too. Keep walking routes clear, use secure rails, improve poor lighting, and avoid rushing when first standing.

    Discuss persistent dizziness, repeated falls, or unusual sleepiness with an appropriate health professional. Eyesight, hearing, blood pressure, medicines, sensation, and health conditions may all affect stability. citeturn500399search32turn500399search38

    Let Movement Adapt With You

    Arthritis may affect what you can comfortably do on a particular day, but it does not make movement meaningless.

    Progress might mean standing for longer without leaning through your arms. It may mean turning without twisting painfully, stepping sideways more confidently, or rising from a chair with less hesitation.

    These improvements may seem small, but they influence independence throughout the day.

    Begin with the support you need. Keep the movements comfortable. Adjust the routine when symptoms change.

    The purpose is not to defeat your joints. It is to help your body continue working with them.

    Frequently Asked Questions

    1. Are balance exercises safe for seniors with arthritis?

    Gentle, supported exercises may be appropriate for many seniors with arthritis. The routine should be adjusted to the joints affected and the current level of pain, swelling, and stability. Personalised advice may be needed when symptoms are severe or movement is significantly limited.

    2. Should I exercise during an arthritis flare?

    Reduce the intensity and avoid movements that aggravate an inflamed joint. Seated exercises and short supported holds may be more tolerable. Significant heat, redness, swelling, or severe pain should be assessed appropriately.

    3. How often should I practise balance exercises?

    Two or three short sessions per week can be a practical starting point. Some gentle movements may be performed more frequently when they do not increase pain, swelling, or fatigue.

    4. Is some discomfort normal during exercise?

    Mild muscular effort or temporary stiffness may occur. Sharp pain, increasing joint pain, catching, locking, or instability is not the goal. Reduce or stop the exercise when symptoms worsen.

    5. Which exercises are easiest on painful joints?

    Seated ankle movements, comfortable standing, small weight shifts, heel raises, short toe taps, and wide staggered holds are often easier to modify. The most suitable exercises depend on which joints are affected.

    6. Can I hold the chair throughout the routine?

    Yes. A sturdy chair or fixed surface provides valuable support. Continue using both hands when arthritis affects your stability or confidence. Exercising without support is not required.

    7. What if one side is more painful than the other?

    Use additional hand support and a smaller weight shift on the painful side. Do not force both sides to perform identically. New, severe, or worsening one-sided symptoms should be assessed.

    8. Can balance exercises cure arthritis?

    No. Balance exercises do not cure arthritis. They may help improve strength, movement control, confidence, and daily function as part of a broader management plan.

    Free Tai Chi Walking: Fall‑Prevention Edition Printables

    Free Tai Chi Walking: Fall‑Prevention Edition Printables

    Get Your Copy Today
  • Stronger Bones, Steadier Steps

    Stronger Bones, Steadier Steps

    When June learned she had osteoporosis, she became afraid of ordinary movement.

    She stopped carrying laundry upstairs. She avoided the garden because the paving was uneven. Even turning quickly in the kitchen made her nervous. She knew that a fall could have more serious consequences for her bones, so staying still seemed like the safest choice.

    Yet the less she moved, the less steady she felt.

    Her legs tired more quickly. Rising from a chair required greater effort. She began reaching for furniture while walking through rooms she had crossed confidently for years.

    This is a common and understandable dilemma. Osteoporosis increases the risk of fractures, but avoiding activity can contribute to weaker muscles, poorer balance, and greater difficulty performing everyday tasks. Appropriate exercise can help maintain strength, improve balance, and reduce some of the factors that contribute to falls. citeturn802742search0turn802742search37

    Balance exercises for seniors with osteoporosis should be carefully chosen. The goal is not to create dramatic wobbles or test the limits of stability. A beginner routine should use secure support, controlled movements, upright posture, and gradual progress.

    The safest place to begin is beside a sturdy chair, with both feet on the floor and no pressure to perform perfectly.

    Why Balance Matters When You Have Osteoporosis

    Osteoporosis reduces bone strength and makes fractures more likely. The hip, wrist, and spine are among the areas commonly affected when fractures occur.

    Exercise cannot remove every fracture risk. However, improving balance, leg strength, posture, and stepping control may help reduce the chance of falling. Balance training has also been shown to improve physical function in older adults with osteoporosis. citeturn802742search14turn802742search36

    Balance depends on several systems working together.

    Your eyes help you understand where you are in relation to your surroundings. Your inner ears detect motion and changes in position. Sensory nerves report what is happening beneath your feet and around your joints. Your brain processes this information while your muscles make constant adjustments.

    Everyday movements rely on this system. Before lifting one foot, you must transfer enough weight onto the other leg. When turning, your feet and body must change direction together. If you step onto an uneven surface, your ankles, hips, and trunk must respond quickly.

    A gentle balance routine gives these abilities regular practice without exposing you to unnecessary risk.

    Osteoporosis Does Not Mean You Must Stop Moving

    A diagnosis can sometimes make movement feel dangerous.

    You may worry that bending, stepping, or losing balance briefly will cause a fracture. That fear can lead to avoiding walking, household tasks, and social activities. Over time, inactivity may reduce muscle strength and confidence, which can make falls more likely rather than less.

    People with osteoporosis are generally encouraged to remain active at a level suited to their health, fracture history, and physical ability. Exercise programmes commonly include balance training, functional movements, muscle strengthening, posture work, and suitable weight-bearing activity. citeturn802742search10turn802742search29

    The important word is suitable.

    A person with stable osteoporosis and no fracture history may have different exercise needs from someone with severe bone loss, several previous fractures, significant spinal changes, or very poor balance.

    Anyone with a recent fracture, persistent unexplained pain, repeated falls, or substantial difficulty standing should obtain individual guidance before beginning.

    Protect the Spine During Exercise

    Balance training does not require repeated bending, forceful twisting, or rapid movements.

    Normal daily movement is not automatically dangerous, but forceful, repeated, sudden, or heavily loaded forward bending may place unnecessary stress on the spine. Deep twisting performed under load may also be inappropriate, particularly for someone with a history of spinal fractures or very low bone density. citeturn802742search8turn802742search40

    During this routine:

    • Keep the chest comfortably lifted.
    • Move from the hips when leaning forward.
    • Avoid rounding deeply through the back.
    • Turn through several small steps instead of twisting on planted feet.
    • Keep movements slow and predictable.
    • Do not add weights unless the exercise has been individually assessed.
    • Stop if you experience sudden or increasing back pain.

    Good posture does not mean holding the spine rigidly. Aim for a comfortable upright position that allows you to breathe normally.

    Create a Safe Exercise Area

    Use a firm, level floor in a well-lit room.

    Place a sturdy chair in front of you. It should not have wheels, rock, fold unexpectedly, or slide when pressure is applied. Positioning the chair against a wall can make it more secure.

    A fixed kitchen bench may also provide support.

    Clear the surrounding area of:

    • Loose rugs
    • Electrical cords
    • Shoes and bags
    • Pet toys
    • Low furniture
    • Wet or slippery patches

    Wear secure, well-fitting footwear with nonslip soles. Avoid loose slippers and socks on smooth flooring.

    Keep another chair nearby for rest. Someone should remain with you if you have recently fallen, feel very unsteady, or are uncertain whether you could recover safely from a wobble.

    Do not practise balance near sharp furniture edges, stairs, glass tables, or objects you could strike if you lost your footing.

    A Beginner Balance Routine for Osteoporosis

    Complete one set of each exercise. Use both hands for support initially and rest whenever needed.

    The full routine may take approximately 10 to 15 minutes. Beginners can start with only the first five exercises.

    1. Upright Standing Reset

    Stand behind the chair with your feet approximately hip-width apart.

    Place both hands lightly on the chair. Keep your knees softly relaxed and look forward.

    Imagine the top of your head gently rising. Allow your shoulders to settle and position your chest comfortably over your hips.

    Do not force the back into an exaggerated arch.

    Take five slow breaths and hold the position for 20 to 30 seconds.

    Notice how your feet contact the floor. Try to distribute your weight through the heels, the balls of the feet, and the toes.

    This exercise provides a centred position to which you can return after every movement.

    2. Side-to-Side Weight Shifts

    Keep both feet on the floor.

    Slowly transfer more of your weight onto your right foot. Pause briefly, return to the centre, and shift towards the left.

    Complete eight shifts in each direction.

    Keep your trunk upright rather than bending sideways. Imagine your shoulders, ribs, and hips moving together over the supporting foot.

    The movement may be only a few centimetres.

    These shifts practise the transfer required before taking a step.

    3. Forward and Back Weight Shifts

    Stand with your feet comfortably apart and both hands supported.

    Move your weight slightly towards the balls of your feet without lifting your heels.

    Return to the centre, then shift gently towards your heels without lifting your toes.

    Repeat six to ten times.

    Keep your body relatively straight. Avoid bending from the waist or rounding the back.

    This movement should come mainly from the ankles.

    4. Alternating Heel Raises

    Lift your right heel while keeping the toes on the floor.

    Lower it slowly, then lift your left heel.

    Continue for 12 to 20 alternating repetitions.

    Keep your trunk tall and avoid pulling heavily against the chair.

    When alternating lifts feel easy, try lifting both heels together. Rise only as high as you can without rolling the ankles or losing control.

    Heel raises strengthen the calf muscles and encourage controlled movement around the ankles.

    5. Supported Toe Raises

    Keep both heels on the floor and lift the toes and front of the feet.

    Pause briefly, then lower them slowly.

    Complete eight to twelve repetitions.

    Avoid leaning backwards or pulling on the chair. Alternate feet if lifting both together feels difficult.

    The muscles involved help lift the feet during walking, which may support clearer steps and reduce shuffling.

    6. Foot Unweighting

    Shift more of your weight onto your left leg.

    Keep the toes of your right foot touching the floor, but make that foot lighter. Hold for three seconds and return to the centre.

    Repeat on the other side.

    Complete three to five attempts per leg.

    This kickstand position introduces single-leg support without requiring the foot to leave the floor.

    Use as much hand support as necessary.

    7. Low Supported Marching

    Hold the chair securely.

    Shift your weight onto the left leg and lift the right foot one or two centimetres. Place it down completely before lifting the left foot.

    Continue for 10 to 20 slow alternating steps.

    Keep the knees low and place each foot down quietly. Avoid rocking sharply from side to side.

    If lifting a foot feels unsafe, return to the foot-unweighting exercise.

    8. Side Toe Taps

    Move your weight onto your left leg.

    Tap the right foot a short distance to the side, then bring it back underneath you.

    Repeat five to eight times and change sides.

    Keep your chest facing forward. Do not twist through the spine to follow the moving foot.

    Side taps practise the movements used when navigating furniture, entering narrow spaces, or correcting a sideways wobble.

    9. Forward Step and Return

    Hold the chair and take a short step forward with your right foot.

    Place the entire foot on the floor and transfer a small amount of weight onto it. Pause, then return to the starting position.

    Repeat with the left foot.

    Complete five to eight steps per side.

    Keep the steps short enough that you do not need to pull yourself backwards using the chair.

    Remain upright and avoid rounding the back as you step.

    10. Wide Staggered Stance

    Place your right foot slightly in front of the left.

    Keep the feet separated sideways rather than positioning one directly in front of the other.

    Hold for 10 to 20 seconds, then change which foot is in front.

    Complete two holds per side.

    This stance resembles a walking position while providing more stability than a heel-to-toe stance.

    Widen the feet if you begin wobbling significantly.

    11. Small-Step Turns

    Stand behind the chair with both hands ready for support.

    Take several small steps to turn slightly towards the right. Return to the centre and repeat towards the left.

    Complete three to five turns in each direction.

    Move the feet with the body. Do not plant the feet and twist sharply through the knees, hips, or spine.

    Small-step turning is useful because many falls occur while changing direction rather than while walking straight ahead.

    12. Spine-Safe Sit-to-Stand

    Sit towards the front of a firm chair that cannot slide.

    Place your feet flat and slightly behind your knees. Keep your chest comfortably lifted.

    Lean forward from the hips rather than rounding deeply through the back. Press through your feet and use the armrests or chair seat if necessary to stand.

    Pause until you feel steady.

    Move your hips backwards and lower yourself slowly, keeping your chest lifted.

    Complete three to eight repetitions.

    A partial lift is acceptable. Use a higher chair if deep hip or knee bending feels difficult.

    Sit-to-stands strengthen the legs and practise a movement needed throughout daily life.

    A Five-Minute Starter Routine

    During the first week, try:

    1. Upright standing reset
    2. Side-to-side weight shifts
    3. Alternating heel raises
    4. Foot unweighting
    5. Three supported marches per side
    6. Two or three sit-to-stands

    Practise two or three times during the week.

    When these movements feel controlled, gradually add side taps, forward steps, staggered standing, and small turns.

    People with very poor balance or previous spinal fractures may benefit from a supervised, individually structured programme rather than progressing alone. citeturn802742search21

    How to Progress Without Increasing Risk

    Change only one part of an exercise at a time.

    You might:

    • Add two repetitions.
    • Hold a stance five seconds longer.
    • Move more slowly.
    • Use slightly lighter hand pressure.
    • Take a marginally wider step.
    • Add one sit-to-stand.
    • Complete one additional short session each week.

    Do not reduce support, increase the movement range, and add repetitions simultaneously.

    Avoid standing on cushions, closing your eyes, walking backwards without supervision, or using unstable balance equipment. These changes may produce a large increase in fall risk.

    Progress may mean smoother movement, less gripping, or greater confidence. It does not require unsupported exercise.

    Stop Before Fatigue Changes Your Movement

    Fatigue can make an otherwise safe exercise less controlled.

    End the session if you notice:

    • Shaking or buckling legs
    • Dragging feet
    • Increasing dependence on the chair
    • Sudden or worsening pain
    • Difficulty maintaining upright posture
    • Uncontrolled steps
    • Dizziness or light-headedness
    • Fear that you may fall

    Mild muscular effort is expected, but balance practice should not continue until exhaustion.

    When to Seek Medical Advice

    Stop exercising and arrange appropriate advice if you develop new or increasing back, hip, wrist, or other bone pain.

    Seek urgent help after a fall when there is severe pain, visible deformity, inability to bear weight, new weakness, difficulty breathing, or concern about a head injury.

    Prompt medical assessment is also important for sudden one-sided weakness, facial drooping, difficulty speaking, fainting, chest pain, or a sudden severe headache.

    A fracture may not always produce dramatic symptoms immediately. Persistent pain following a fall or sudden movement should not be ignored.

    Confidence Is Part of Fracture Prevention

    Fear after an osteoporosis diagnosis is understandable.

    The possibility of a fracture may make every wobble feel dangerous. Yet confidence is not rebuilt by pretending there is no risk. It develops through repeated, successful movement in a carefully controlled environment.

    Progress may first appear in small moments.

    You may rise from a chair without reaching suddenly for the table. You might turn using several smooth steps or walk through the kitchen without touching the bench.

    These improvements matter because they support independence.

    Osteoporosis changes the importance of preventing falls, but it does not remove the value of movement. Begin with stable support, protect your spine, and let each controlled exercise build a safer foundation beneath your feet.

    Frequently Asked Questions

    1. Are balance exercises safe for seniors with osteoporosis?

    Many gentle, supported exercises can be appropriate. Safety depends on fracture history, bone health, balance ability, pain, and other medical conditions. People with recent fractures, severe osteoporosis, or very poor balance should obtain individual guidance.

    2. Can I bend forward during balance exercises?

    Normal movement is not automatically unsafe, but forceful, repeated, sudden, or heavily loaded spinal bending may increase risk for some people. Use a hip-hinge movement, keep the chest lifted, and seek personalised advice if you have had spinal fractures.

    3. How often should I practise balance?

    Two or three short sessions per week can be a practical starting point. Regular practice is generally more useful than an occasional long workout. Stop before fatigue reduces your control.

    4. Should I hold a chair throughout the routine?

    Yes, when needed. A sturdy chair or fixed bench provides valuable protection. Some people may always use hand support, particularly during marching, stepping, and narrow-stance exercises.

    5. Are one-legged balance exercises appropriate?

    A full one-legged stand may be too difficult for beginners. Start by shifting your weight and keeping the opposite toes on the floor as a kickstand. Lift the foot only when you can do so safely beside secure support.

    6. Which movements should be approached cautiously?

    Forceful spinal bending, loaded twisting, sudden jerking, uncontrolled high-impact movement, and exercises with a high risk of falling may be unsuitable. Individual restrictions depend on fracture history and physical ability.

    7. What should I do if an exercise causes back pain?

    Stop the movement and return to a comfortable position. New, sharp, persistent, or increasing back pain should be assessed, particularly when there is a history of osteoporosis or spinal fractures.

    8. Can balance training prevent every fracture?

    No. Balance training may reduce some fall-related risks, but it cannot prevent every fall or fracture. Bone strength, medicines, eyesight, footwear, blood pressure, home hazards, health conditions, and the nature of an accident also affect risk.

    Free Tai Chi Walking: Fall‑Prevention Edition Printables

    Free Tai Chi Walking: Fall‑Prevention Edition Printables

    Get Your Copy Today
  • Steady Ground: A Gentle Balance Routine for Seniors With Vertigo

    Steady Ground: A Gentle Balance Routine for Seniors With Vertigo

    The room did not actually move, but for a few seconds, Margaret was certain it had.

    She gripped the kitchen bench and waited for the spinning sensation to settle. Afterwards, even walking across the room felt different. She moved cautiously, kept her head unusually still, and searched for something solid before every turn.

    Vertigo can do more than create unpleasant physical symptoms. It can make familiar surroundings feel unpredictable. A person who once walked confidently may begin avoiding showers, stairs, outdoor paths, or any movement that might trigger another episode.

    That caution is understandable. However, once the cause of the vertigo has been properly assessed and symptoms are stable enough for activity, carefully selected balance exercises may help rebuild strength, movement control, and confidence.

    A beginner balance routine for seniors with vertigo must be more conservative than a general balance workout. Fast turns, repeated head movements, unsupported one-legged poses, and exercises performed with closed eyes are not appropriate starting points.

    The safest routine begins while seated, keeps the eyes focused on a stable point, uses secure hand support, and avoids deliberately provoking spinning.

    Vertigo Is More Than General Unsteadiness

    People often use the words dizziness and vertigo interchangeably, but they do not always describe the same sensation.

    Vertigo usually involves an illusion of movement. You may feel as though you are spinning, tilting, swaying, or being pulled in one direction. Alternatively, the room may appear to move around you.

    General dizziness may feel more like light-headedness, faintness, floating, or instability.

    This difference matters because vertigo can have several possible causes. Problems involving the inner ear are common, but medicines, infections, circulation, migraine-related conditions, and neurological problems may also contribute. Some forms of positional vertigo are triggered by particular head movements, while other balance disorders follow different patterns. citeturn897671search13turn897671search16

    Exercise cannot determine which condition you have. A routine that is helpful for one type of vertigo may be inappropriate for another.

    Obtain Medical Guidance Before Starting

    New, recurring, or unexplained vertigo should be assessed before you begin a home balance programme.

    This is particularly important when the symptoms:

    • Started suddenly
    • Are becoming more frequent
    • Followed a fall or head injury
    • Are accompanied by hearing changes
    • Occur after starting or changing medicine
    • Cause vomiting or an inability to walk safely
    • Last longer than expected
    • Have no known diagnosis

    Seek urgent medical assistance when vertigo occurs with facial drooping, difficulty speaking, sudden weakness or numbness, double vision, severe headache, fainting, chest pain, loss of coordination, or an inability to stand. These symptoms should not be assumed to be an ordinary inner-ear problem.

    Balance disorders can be associated with a wide range of health conditions and medicines, which is why repeated symptoms need individual assessment rather than guesswork. citeturn897671search1turn897671search19

    Do Not Exercise During an Active Attack

    If the room is spinning, balance practice should stop.

    Sit or lie down safely according to the advice you have been given. Avoid walking unassisted, climbing stairs, driving, showering alone, or attempting to “work through” severe symptoms.

    Wait until the episode has settled and you feel stable enough to stand safely.

    Even after the spinning stops, you may remain tired, nauseated, or unsteady. On those days, seated exercises may be more appropriate than standing practice.

    A balance routine should challenge your stability gently. It should never compete with an active vertigo episode.

    Avoid Self-Directed Repositioning Exercises

    Some specific forms of positional vertigo may respond to treatment manoeuvres involving carefully sequenced head and body positions. However, these are not general balance exercises.

    They should be used only when the condition has been correctly identified and the technique is appropriate for the person. Neck problems, back conditions, circulation concerns, mobility limitations, and other health factors may affect whether a particular manoeuvre is suitable.

    This beginner routine does not include rapid head turns, lying transitions, repeated looking upward, or deliberate symptom-provoking movements.

    Vestibular rehabilitation may eventually involve controlled eye, head, and walking exercises, but these should be selected according to the diagnosis and response to treatment.

    Create a Vertigo-Safer Exercise Area

    Choose a quiet, well-lit room with a firm, level floor.

    Place a sturdy chair in front of you. It should not have wheels, rock, fold, or slide when pressure is applied. Position its back against a wall whenever possible.

    Keep another chair immediately behind or beside you for seated rest.

    Remove:

    • Loose rugs
    • Electrical cords
    • Bags and footwear
    • Pet toys
    • Low furniture
    • Reflective or visually distracting objects
    • Anything that could be struck during a fall

    Wear secure, well-fitting footwear with nonslip soles.

    Exercise when another responsible adult is nearby, particularly during your first sessions. Keep a telephone or personal alert device within reach.

    Choose one fixed object directly ahead, such as a plain picture frame or mark on the wall. Looking at a stable point can make the routine feel less visually confusing than looking around the room.

    The Gentle Beginner Routine

    Complete the exercises slowly. Keep your head in a comfortable, neutral position and your eyes focused forward.

    Begin with one set. Stop immediately if spinning begins or symptoms increase significantly.

    1. Seated Grounding

    Sit in a firm chair with both feet flat on the floor.

    Rest your hands on your thighs or the sides of the chair. Look at your chosen fixed point.

    Take five slow, comfortable breaths.

    Notice the support beneath your feet, thighs, and hips. Remind yourself that the chair and floor are stationary, even if your senses sometimes suggest movement.

    Remain seated for 30 seconds.

    This opening exercise helps you settle before introducing movement. It can also reveal whether you already feel too symptomatic to continue.

    2. Seated Heel and Toe Lifts

    Keep your toes on the floor and slowly lift both heels.

    Lower the heels, then keep them down while raising the toes and front of the feet.

    Repeat eight to twelve times.

    Keep your head still and avoid looking down repeatedly. You can glance at your feet once before beginning, then return your gaze to the fixed point.

    These movements activate the lower legs and ankles without requiring you to stand.

    3. Seated Marching

    Hold the sides of the chair if needed.

    Lift your right foot slightly, place it down, and then lift the left foot.

    Continue for 10 to 20 slow repetitions.

    The knees do not need to rise high. Keep your upper body upright and your eyes forward.

    Stop if the movement creates nausea, spinning, or an escalating sense of disorientation.

    4. Seated Side Weight Shifts

    Keep both feet firmly planted.

    Move your upper body slightly towards the right while keeping both hips on the chair. Return to the centre, then move slightly towards the left.

    Complete six shifts in each direction.

    The movement should be small and slow. Avoid tilting your head towards the shoulder.

    This introduces controlled weight transfer while the chair provides a wide, dependable base.

    5. Supported Standing Hold

    Stand behind the chair with someone nearby.

    Place both hands securely on the chair. Keep your feet approximately hip-width apart and your knees softly relaxed.

    Look at the fixed point ahead. Avoid looking around the room.

    Hold for five to twenty seconds.

    Sit down and rest before repeating once or twice.

    If standing produces light-headedness, spinning, visual movement, or sudden weakness, sit immediately and do not continue the standing routine.

    6. Small Side-to-Side Weight Shifts

    With both hands on the chair, move a little more weight onto your right foot.

    Return to the centre, then shift towards the left.

    Complete six to eight shifts in each direction.

    Keep both feet on the floor and your head facing forward. The movement may be only a few centimetres.

    This exercise practises the transfer needed before taking a step without requiring a foot to leave the ground.

    7. Forward and Back Pressure Shifts

    Remain upright with both feet securely placed.

    Move your weight slightly towards the balls of your feet without lifting your heels. Return to the centre.

    Shift gently towards your heels without lifting your toes.

    Repeat six to eight times.

    Do not bend forward from the waist or tilt your head. Keep the movement small enough that your hands remain relaxed rather than gripping desperately.

    8. Alternating Heel Raises

    Lift your right heel while keeping the toes on the floor.

    Lower it slowly, then lift the left heel.

    Continue for 10 to 16 alternating repetitions.

    Both feet remain partly connected to the floor, making this gentler than marching.

    Stop if repeated movement creates visual disturbance or a growing sense of motion.

    9. Supported Foot Unweighting

    Shift your weight gently onto your left leg.

    Keep the toes of the right foot touching the floor, but make that foot lighter. Hold for two or three seconds.

    Return to the centre and repeat on the other side.

    Complete three attempts per leg.

    The toes act as a kickstand. There is no need to lift the foot.

    This exercise begins preparing each leg to support more body weight while preserving a wide margin of safety.

    10. Short Side Toe Taps

    Move your weight onto the left leg.

    Tap the right foot a short distance to the side and bring it back beneath you.

    Repeat four to six times, then change sides.

    Keep your head and chest facing forward. Do not watch the moving foot throughout the exercise.

    A very short tap is enough. Accuracy and control matter more than distance.

    11. Low Supported Marching

    Attempt this exercise only when the earlier movements feel comfortable.

    Hold the chair with both hands. Lift your right foot one or two centimetres, place it down fully, and then lift the left foot.

    Complete six to twelve slow steps.

    Pause briefly between each lift.

    Do not combine marching with head turning. Stop if you feel spinning, nausea, visual bouncing, or a sense that the floor is moving.

    12. Supported Sit-to-Stand

    Sit towards the front of a firm chair that cannot slide.

    Place your feet flat and slightly behind your knees. Focus on the fixed point ahead.

    Lean forward gently from the hips and use the armrests or seat to help yourself stand.

    Remain still for several seconds before attempting to move.

    Lower yourself slowly and complete two to six repetitions.

    Standing too quickly can sometimes cause light-headedness unrelated to vertigo. Pause after each transition and do not begin walking until you feel settled.

    A Five-Minute Starting Routine

    During the first week, use only:

    1. Seated grounding
    2. Heel and toe lifts
    3. Seated marching
    4. Supported standing
    5. Small side weight shifts
    6. Two sit-to-stands

    Practise on two or three days when symptoms are quiet.

    Do not add a new exercise simply because the routine feels short. With vertigo, learning how your symptoms respond is more important than completing many repetitions.

    Balance and strength activities can form part of fall prevention, but the programme must be matched to the individual’s medical condition and current stability. citeturn897671search0turn897671search5

    How to Progress Safely

    Change only one element at a time.

    You may:

    • Add two repetitions
    • Extend a standing hold by five seconds
    • Use slightly lighter hand pressure
    • Tap the foot a little farther
    • Add one additional sit-to-stand
    • Complete one extra short session during the week

    Do not add head turns, close your eyes, narrow your feet, and reduce hand support at the same time.

    In fact, head-movement and gaze exercises should be added only when they are part of an individually recommended vestibular rehabilitation plan.

    The right progression may produce mild effort, but it should not trigger a strong spinning episode.

    Distinguish Mild Challenge From Warning Signs

    You may experience slight uncertainty because you are practising balance. This should settle quickly when you stop moving or increase your hand support.

    Stop immediately if you experience:

    • Spinning or tilting
    • Increasing nausea
    • Sudden sweating or pallor
    • Visual bouncing or blurring
    • New ringing or pressure in an ear
    • Sudden hearing changes
    • Faintness
    • Severe headache
    • New weakness or numbness
    • Loss of coordination
    • An inability to remain upright

    Do not continue simply to complete the routine.

    Record what happened, including the exercise, head position, duration, and associated symptoms. This information may help an appropriate health professional understand the pattern.

    Confidence May Take Longer Than Strength

    Vertigo can leave a powerful memory.

    Even after treatment reduces the spinning, you may continue expecting the room to move. This anticipation can make the shoulders tense, the steps shorten, and every turn feel threatening.

    Rebuilding confidence takes repeated experiences in which movement ends safely.

    Your first success may be standing for ten seconds without symptoms. Later, you may complete several weight shifts or walk across the kitchen without gripping the bench.

    These changes are valuable.

    Do not judge progress by whether you can perform a difficult exercise. Judge it by whether ordinary movement is becoming calmer, more controlled, and less frightening.

    Make Daily Life Safer While Recovering

    Keep frequently used pathways clear and well lit. Sit while dressing when standing on one leg feels unsafe. Use appropriate rails in bathrooms and on steps.

    Move slowly when getting out of bed. Sit on the edge for a moment before standing, then pause again before walking.

    Avoid climbing onto stools or chairs. Ask for help with tasks that require reaching overhead if looking upward triggers symptoms.

    Use a walking aid when one has been recommended, but make sure it is correctly adjusted and used as instructed.

    Fall prevention involves more than exercise. Medicines, eyesight, hearing, footwear, blood pressure, health conditions, and the home environment may all require attention. citeturn897671search14turn897671search23

    Vertigo can make movement feel unreliable, but recovery does not require rushing into difficult balance challenges. Begin seated, keep your eyes on a stable point, and use secure support.

    The goal is not to prove that you can ignore the spinning. It is to move safely when the world feels still.

    Frequently Asked Questions

    1. Are balance exercises safe for seniors with vertigo?

    They may be appropriate after the cause has been assessed and symptoms are stable enough for activity. Begin with seated and fully supported movements. Active spinning, severe nausea, or unexplained new symptoms are reasons not to exercise.

    2. Should I deliberately trigger vertigo during exercise?

    Not during a general beginner routine. Some specialised rehabilitation exercises may temporarily provoke symptoms, but they should be selected and monitored according to the diagnosed condition.

    3. Can I perform head-turning exercises at home?

    Head and gaze exercises may be helpful for some vestibular conditions, but they are not suitable for everyone. Use them only when they have been recommended for your specific diagnosis.

    4. How long should a beginner session last?

    Three to ten minutes may be enough. Stop before symptoms increase or fatigue affects your safety. A short, well-tolerated session is preferable to a longer routine that triggers a severe episode.

    5. How often should I practise?

    Two or three short sessions per week may be a reasonable starting point when symptoms are stable. Follow any individual recommendations provided for your condition.

    6. What should I do if spinning begins during an exercise?

    Stop immediately, hold the support, and sit down safely. Keep still until the sensation settles. Do not restart the session that day if symptoms remain significant or return when you stand.

    7. Is vertigo the same as feeling light-headed?

    No. Vertigo usually involves a false sensation of movement or spinning. Light-headedness may feel more like faintness or floating. Both require assessment when they are frequent, severe, or unexplained.

    8. Can balance exercises cure vertigo?

    No general balance routine can cure every cause of vertigo. Exercises may improve strength, stability, and confidence, while some diagnosed vestibular conditions respond to specialised rehabilitation or treatment manoeuvres. Appropriate treatment depends on the underlying cause.

    Free Tai Chi Walking: Fall‑Prevention Edition Printables

    Free Tai Chi Walking: Fall‑Prevention Edition Printables

    Get Your Copy Today
  • Feel the Floor Again: Gentle Balance Training for Neuropathy

    Feel the Floor Again: Gentle Balance Training for Neuropathy

    Alan first noticed the numbness while getting ready for bed.

    His feet felt as though he were wearing thick socks, even after he had removed them. Over time, the sensation became part of daily life. He could still walk, but he no longer felt completely certain about where each foot had landed.

    Uneven ground became uncomfortable. Dim rooms felt less secure. When he stepped away from the kitchen bench, he sometimes looked down to confirm that his feet were where he expected them to be.

    This is one of the ways neuropathy can influence balance.

    Nerves help the brain understand pressure, touch, temperature, pain, and the position of the body. When nerves in the feet and legs are damaged, those messages may become weaker, distorted, delayed, or absent. Some people experience numbness, while others have burning, tingling, pain, weakness, or difficulty lifting the feet. Peripheral neuropathy can also contribute to walking problems and physical disability. citeturn991657search2

    Balance exercises for seniors with neuropathy should therefore be approached carefully. The goal is not to stand on unstable surfaces or test how long you can remain unsupported. A safer beginner routine uses reliable hand support, good lighting, secure footwear, and slow movements that help the eyes, muscles, and remaining sensation work together.

    Why Neuropathy Can Make Balance More Difficult

    Imagine trying to walk while wearing several layers of thick fabric around your feet.

    You might still see the floor and move your legs, but the information coming from beneath you would be less precise. You may not immediately recognise whether your weight is centred over the heel, rolling towards the outside of the foot, or shifting onto the toes.

    Neuropathy can create a similar challenge.

    When sensation is reduced, the brain may rely more heavily on vision and information from other joints and muscles. This is why balance can feel worse in darkness or when the eyes are closed.

    Neuropathy may also affect motor nerves, producing weakness in the feet or lower legs. In some cases, difficulty lifting the front of the foot can contribute to tripping or a higher-stepping walking pattern. citeturn991657search19turn991657search31

    Balance is influenced by more than neuropathy, however. Eyesight, hearing, medicines, blood pressure, joint pain, muscle strength, and the inner ears can all affect stability. New or rapidly worsening balance problems should not automatically be blamed on an existing nerve condition.

    Begin With an Appropriate Assessment

    Neuropathy has many possible causes, and its effects vary widely.

    One person may have mild tingling in the toes. Another may have significant numbness, foot weakness, pain, or difficulty walking. Some forms of neuropathy can also affect automatic functions such as blood pressure control, potentially causing dizziness or faintness.

    Arrange an appropriate medical assessment if neuropathy symptoms are new, worsening, or interfering with walking or sleep. Burning, tingling, weakness, persistent pain, dizziness, fainting, and foot wounds that are not healing all deserve attention. citeturn991657search16

    Seek urgent help for sudden one-sided weakness, facial drooping, difficulty speaking, severe new headache, chest pain, fainting, or an abrupt inability to walk normally.

    A home balance routine can support movement, but it cannot identify or treat the underlying cause of nerve damage.

    Check Your Feet Before Exercising

    Reduced sensation can make it difficult to notice a blister, cut, stone inside a shoe, or area of rubbing.

    Before each session, inspect both feet. Check the soles, heels, toes, and spaces between the toes. A mirror may help when the soles are difficult to see.

    Look for:

    • Cuts or cracks
    • Blisters
    • Red or darkened areas
    • Swelling
    • Drainage
    • Unusual warmth
    • Areas rubbed by footwear
    • Changes in the shape of the foot

    Do not exercise through an open wound, infected area, or unexplained swelling. Arrange appropriate care instead.

    Foot examinations are particularly important when nerve damage reduces sensation, because minor injuries may otherwise go unnoticed. citeturn991657search8turn991657search24

    Choose Safe Footwear and Support

    Do not perform beginner neuropathy exercises barefoot.

    Wear well-fitting, secure shoes with nonslip soles. Check inside each shoe before putting it on. Make sure there are no stones, folded insoles, rough seams, or other objects that might injure the foot.

    Avoid loose slippers and socks on smooth flooring.

    Use a sturdy chair without wheels, or a fixed kitchen bench. The support should not rock, fold, tip, or slide when you press against it.

    Clear the surrounding floor of loose rugs, cables, bags, footwear, pet toys, and low objects. Keep the area brightly lit.

    Someone should remain nearby if you have fallen recently, have substantial numbness, experience foot weakness, or are unsure whether you could recover from a wobble.

    The Beginner Neuropathy Balance Routine

    Complete the routine slowly. Begin with one set and use both hands during standing exercises.

    Stop before tiredness causes your feet to drag or your legs to shake.

    1. Seated Foot Awareness

    Sit in a firm chair with both feet flat on the floor.

    Look at your feet and confirm that they are approximately hip-width apart. Press them gently into the floor without gripping with the toes.

    Notice what you can feel. You may sense pressure clearly in some areas and very little in others.

    Take five slow breaths.

    This exercise does not restore lost sensation. It helps you combine visual information with whatever pressure awareness remains.

    Hold for 20 to 30 seconds.

    2. Seated Heel and Toe Lifts

    Keep your toes on the floor and lift both heels slowly.

    Lower the heels, then keep them down while lifting the toes and front of the feet.

    Repeat eight to twelve times.

    Look at the feet periodically to confirm that both are moving. One side may not rise as high, particularly when weakness is present.

    Do not force the movement or continue through cramping, sharp pain, or increasing burning.

    3. Seated Marching

    Hold the sides of the chair if necessary.

    Lift the right foot slightly, place it down carefully, and then lift the left.

    Continue for 10 to 20 alternating repetitions.

    Watch where each foot lands. Aim to return it to approximately the same position rather than allowing it to drift underneath the chair or too far forward.

    This practises controlled foot lifting without requiring full standing balance.

    4. Supported Standing Reset

    Stand behind the chair with your feet approximately hip-width apart.

    Hold the chair with both hands. Keep your knees softly relaxed and look forward.

    Use your eyes to check the position of your feet before beginning. Then focus on a fixed point ahead.

    Hold for 10 to 30 seconds.

    Avoid hanging heavily through the arms. Let the legs support as much weight as they safely can.

    Sit down immediately if you become light-headed, unusually weak, or disoriented.

    5. Side-to-Side Weight Shifts

    Keep both feet on the floor.

    Move a small amount of weight onto the right foot. Return to the centre, then shift towards the left.

    Complete six to ten shifts in each direction.

    The movement may be only a few centimetres.

    Because sensation may be reduced, use visual cues as well as physical ones. Keep your shoulders approximately level and check that you are moving over the foot rather than bending sideways at the waist.

    6. Forward and Back Pressure Shifts

    Stand with both hands supported.

    Move your weight slightly towards the balls of your feet without lifting your heels. Return to the centre.

    Shift gently towards the heels without raising the toes.

    Repeat six to eight times.

    Keep the range small. Avoid leaning far enough that you need to pull yourself back using the chair.

    This exercise allows the ankles and lower legs to practise controlling forward and backward movement.

    7. Alternating Heel Raises

    Lift your right heel while keeping the toes on the floor.

    Lower it completely, then lift the left heel.

    Continue for 10 to 16 alternating repetitions.

    Watch the ankles occasionally. Reduced sensation may make it harder to recognise when a foot is rolling outward.

    Use a very small heel lift if necessary. Control matters more than height.

    8. Supported Foot Unweighting

    Shift your weight onto the left leg while holding the chair.

    Keep the toes of the right foot on the floor, but reduce the pressure through them. Hold for two or three seconds.

    Return to the centre and repeat on the opposite side.

    Complete three attempts per leg.

    This kickstand position challenges the supporting leg without requiring the other foot to leave the floor.

    Do not progress to lifting the foot when numbness or weakness makes its position difficult to control.

    9. Side Toe Taps

    Transfer your weight towards the left leg.

    Move the right foot a short distance to the side and place it down gently. Return it beneath you.

    Repeat five to eight times, then change sides.

    Look down briefly when needed to check placement. Once the foot is secure, return your gaze forward.

    Avoid dragging the foot when possible. When weakness makes lifting difficult, use a smaller movement and seek individual advice about suitable foot or ankle support.

    10. Forward Foot Taps

    Hold the chair and move the right foot a short distance forward.

    Place the heel or whole foot on the floor, pause, and return.

    Repeat with the left foot.

    Complete five to eight taps per side.

    Lift the foot only as high as needed to clear the floor. Watch for toe catching or a foot that lands unpredictably.

    A new or worsening inability to lift the front of a foot should be medically assessed.

    11. Low Supported Marching

    Attempt this exercise only when foot unweighting and tapping feel controlled.

    Lift your right foot one or two centimetres. Place it down fully before lifting the left.

    Continue for six to twelve alternating steps.

    Keep the movement slow. Check that each foot lands flat and does not cross in front of the other.

    Stop if the feet begin dragging, the knees buckle, or you cannot tell where a foot has landed without looking continuously.

    12. Wide Staggered Standing

    Place the right foot slightly in front of the left.

    Keep plenty of space between the feet from side to side. Do not attempt a tight heel-to-toe position.

    Hold the chair with both hands and remain in the stance for 10 to 20 seconds.

    Change which foot is in front and repeat.

    A wide staggered position resembles part of a walking step while preserving a safer base of support.

    13. Small-Step Turns

    Stand behind the chair.

    Take several small steps to turn slightly towards the right. Return to the centre, then turn towards the left.

    Repeat three times in each direction.

    Lift and replace each foot rather than twisting on a planted foot.

    Turning is often more difficult when foot sensation is reduced because accurate placement becomes less certain. Slow, separate steps provide more time to see and control where each foot lands.

    14. Controlled Sit-to-Stand

    Sit towards the front of a firm chair that cannot slide.

    Place your feet flat and visually check their position. Bring them slightly behind your knees.

    Lean forward from the hips, press through your feet, and use the armrests or seat as needed to stand.

    Pause before walking.

    Move your hips backwards and lower yourself slowly.

    Complete three to eight repetitions.

    This strengthens the thighs and hips while practising the forward weight transfer needed to rise safely.

    Keep Your Eyes Open

    Closing the eyes is sometimes used to make balance exercises more difficult.

    That is not an appropriate beginner progression for many people with neuropathy.

    When sensation from the feet is reduced, vision may provide essential information about body position and the surrounding environment. Removing that information can dramatically increase instability.

    Keep the room well lit and your eyes open. Use a fixed visual target whenever possible.

    More difficulty does not automatically produce more benefit.

    A Five-Minute Starter Routine

    During the first week, practise:

    1. Seated foot awareness
    2. Heel and toe lifts
    3. Supported standing
    4. Small side-to-side shifts
    5. Foot unweighting
    6. Three sit-to-stands

    Complete one set on two or three days.

    Add tapping and marching only when the earlier movements feel controlled.

    Older adults are generally encouraged to include multicomponent physical activity combining balance, strengthening, and aerobic movement, adjusted to their health and ability. citeturn991657search9turn991657search26

    Progress Without Removing Safety

    You may progress by:

    • Adding two repetitions
    • Holding a stance five seconds longer
    • Moving more slowly
    • Using slightly lighter hand pressure
    • Taking a marginally wider tap
    • Adding one sit-to-stand
    • Practising one additional short session

    Change only one feature at a time.

    Avoid cushions, unstable boards, closed-eye exercises, fast pivots, and long unsupported one-legged holds.

    Progress may mean more accurate foot placement, less gripping, or better control during turns. It does not require exercising without support.

    When to Stop

    End the session if you develop:

    • New or increasing foot pain
    • A blister or area of rubbing
    • Dizziness or faintness
    • Sudden weakness
    • Foot dragging
    • Buckling knees
    • Severe burning or cramping
    • Chest pain
    • Unusual breathlessness
    • A feeling that you may fall

    Inspect the feet again after exercising. Check for redness, pressure marks, or skin damage that you may not have felt during the session.

    Let Accuracy Matter More Than Difficulty

    Neuropathy can make the relationship between the feet and the floor feel less dependable.

    Balance training cannot always restore normal sensation, but it can help you practise using vision, muscular control, secure support, and deliberate foot placement more effectively.

    Progress may appear when you turn without crossing your feet. You may place each foot more accurately during marching or feel less anxious while standing at the kitchen bench.

    These changes matter.

    Begin with the floor brightly lit, your shoes securely fitted, and both hands near support. Move slowly enough to see where every step begins and ends.

    Frequently Asked Questions

    1. Are balance exercises safe for seniors with neuropathy?

    Gentle, supported exercises may be appropriate when the feet are healthy enough for activity and the person can stand safely. Significant numbness, weakness, wounds, or repeated falls may require individual guidance.

    2. Should I exercise barefoot to feel the floor better?

    Generally, beginners with reduced sensation should wear secure, well-fitting footwear. Bare feet may be injured without the person immediately noticing. Inspect both feet and the inside of the shoes before exercising.

    3. Why is my balance worse in the dark?

    Reduced sensation in the feet may cause greater reliance on vision. When lighting is poor, less information is available about the environment and body position. Keep pathways and exercise areas well lit.

    4. Should I close my eyes to improve balance?

    Not as a beginner exercise when neuropathy affects foot sensation. Closing the eyes can greatly increase instability. Keep your eyes open and use stable hand support.

    5. How often should I practise?

    Two or three short sessions per week can be a practical starting point. The appropriate frequency depends on pain, fatigue, foot health, weakness, and other medical conditions.

    6. What if one foot is more numb than the other?

    Use more hand support and a smaller movement on that side. Watch the foot carefully during placement. New or worsening one-sided numbness or weakness should be assessed appropriately.

    7. Can exercise reverse neuropathy?

    A balance routine does not reverse every cause of neuropathy. Exercise may improve strength, movement control, physical function, and confidence, while treatment of the underlying cause requires appropriate medical care.

    8. Can balance exercises prevent every fall?

    No. Exercise may improve useful balance skills, but falls can also involve eyesight, medicines, blood pressure, footwear, foot injuries, muscle weakness, fatigue, health conditions, and environmental hazards.

    Free Tai Chi Walking: Fall‑Prevention Edition Printables

    Free Tai Chi Walking: Fall‑Prevention Edition Printables

    Get Your Copy Today
  • Slow Steps, Stronger Balance

    Slow Steps, Stronger Balance

    Balance rarely disappears overnight.

    More often, it changes in small ways. You pause before stepping off a curb. You touch the kitchen bench while turning. You sit down to put on your trousers because standing on one leg no longer feels dependable.

    These adjustments can be sensible, but they may also lead to less movement. When movement decreases, the muscles and reactions that support balance receive fewer opportunities to work. Legs may become weaker, steps may become shorter, and ordinary activities can begin to feel more intimidating.

    A slow and safe balance routine for older beginners can help interrupt that cycle.

    The goal is not to perform impressive poses or test how long you can stand without support. It is to practise simple movements calmly enough that your body can learn from them. With a sturdy chair, a clear floor, and a few minutes of focused effort, you can begin working on posture, weight shifting, foot placement, and controlled stepping.

    Progress does not have to be dramatic to be meaningful. A steadier turn, a smoother rise from a chair, or one less grab for the furniture can all signal improvement.

    Why Slow Movement Helps Balance

    Moving slowly may appear easier, but it often requires more control.

    When a movement is rushed, momentum can carry the body through it. Slow movement gives the muscles, joints, sensory systems, and brain time to coordinate each stage. You can notice where your weight is moving, how your feet contact the floor, and whether you are leaning unnecessarily.

    Balance depends on several systems working together. Your eyes provide information about your surroundings. Structures in the inner ears help detect motion and changes in position. Sensory nerves report what is happening beneath the feet and around the joints. The brain processes this information and directs the muscles to make constant adjustments.

    Gentle practice gives these systems repeated opportunities to cooperate.

    Slow exercise also makes it easier to recognise warning signs. You are more likely to notice dizziness, pain, unusual weakness, or excessive fatigue before the movement becomes unsafe.

    Create a Safe Exercise Space

    Choose a flat, dry area with good lighting.

    Place a sturdy chair in front of you. It should not have wheels, rock, fold unexpectedly, or slide easily. Positioning the chair against a wall can make it more secure. A fixed kitchen bench may also provide reliable support.

    Remove anything that could become a trip hazard, including:

    • Loose rugs
    • Electrical cords
    • Bags and shoes
    • Pet toys
    • Low furniture
    • Wet patches
    • Clutter around the chair

    Wear comfortable, supportive footwear with nonslip soles. Avoid loose slippers and socks on smooth flooring.

    Keep a telephone or personal alert device nearby when exercising alone. Someone should remain close if you have recently fallen, feel very unsteady, or are unsure whether you could recover from a wobble.

    Speak with an appropriate health professional before beginning if you experience unexplained dizziness, fainting, significant breathlessness, recent changes in balance, severe pain, new weakness, or a health condition that limits movement.

    How Much Support Should You Use?

    Begin with both hands on the chair.

    This is not cheating. It allows you to learn each movement while reducing fear and unnecessary tension. Once an exercise feels controlled, you may gradually rest your hands more lightly.

    A safe progression may involve:

    1. Holding firmly with both hands
    2. Resting both hands lightly
    3. Using one hand
    4. Touching with several fingertips
    5. Keeping your hands close without touching

    You do not need to reach the final stage. Some older adults may always need support during certain exercises and can still benefit from practising them.

    Only reduce your hand contact when you can complete the movement without leaning, gripping, holding your breath, or taking sudden corrective steps.

    The Slow and Safe Balance Routine

    Perform each movement gently. Breathe normally and rest whenever necessary.

    Your first session may take only five to ten minutes. One controlled set is enough.

    1. Calm Standing Reset

    Stand behind the chair with your feet approximately hip-width apart. Place both hands on the chair.

    Keep your knees soft rather than locked. Relax your shoulders and look forward. Imagine the top of your head gently rising towards the ceiling.

    Take five slow breaths.

    Notice where you feel pressure beneath your feet. Try to distribute your weight across the heels, the balls of the feet, and the toes.

    Hold for 20 to 30 seconds.

    This starting position helps you recognise where centred standing feels comfortable before introducing movement.

    2. Side-to-Side Weight Shifts

    Keep both feet on the floor.

    Slowly move more of your weight onto your right foot. Pause for one or two seconds, return to the centre, and then shift towards the left.

    Complete six to ten shifts in each direction.

    Keep your body tall rather than bending sideways at the waist. The movement may be only a few centimetres.

    Weight shifting is one of the foundations of walking. Before one foot can leave the floor, the other leg must accept more of your weight.

    3. Forward and Back Weight Shifts

    Remain behind the chair with your feet comfortably apart.

    Slowly move your weight towards the balls of your feet without lifting your heels. Return to the centre.

    Shift gently towards your heels without lifting your toes.

    Repeat six to ten times.

    Keep the movement small. Do not lean as far as possible.

    This drill encourages the ankles and feet to respond to changes in body position. Similar adjustments occur when reaching, stopping, or beginning to walk.

    4. Alternating Heel Lifts

    Hold the chair and lift your right heel while keeping the toes on the floor.

    Pause briefly, lower the heel, and repeat on the left side.

    Continue for 12 to 20 alternating repetitions.

    Move slowly enough that one heel is completely lowered before the other rises.

    This exercise gently strengthens the calf muscles and introduces controlled weight transfer while both feet remain partly connected to the floor.

    When alternating lifts become comfortable, you may try raising both heels together. Lower them slowly rather than dropping them.

    5. Gentle Toe Lifts

    Keep your heels on the floor and slowly lift the toes and the front of both feet.

    Pause, then lower them carefully.

    Repeat eight to twelve times.

    Avoid leaning far backwards or pulling against the chair. If lifting both feet together is difficult, alternate sides.

    The muscles at the front of the lower legs help lift the feet during walking. Practising this movement may support better foot clearance.

    6. Slow Supported Marching

    Stand tall with both hands resting on the chair.

    Shift your weight onto the left leg. Lift your right foot a small distance from the floor, pause, and place it down completely.

    Repeat with the left foot.

    Continue for 10 to 20 alternating steps.

    Your knees do not need to rise high. A lift of one or two centimetres may be enough at first.

    Focus on placing each foot down quietly. Avoid rocking sharply from side to side.

    For an easier version, lift only one heel at a time while keeping the toes on the floor.

    7. Side Toe Taps

    Stand with your feet comfortably close together.

    Move your weight onto the left leg. Slowly move your right foot a short distance to the side and tap the floor.

    Bring it back to the starting position.

    Repeat five to eight times, then change sides.

    Keep the tapping foot in contact with the floor if lifting it feels unsafe. The purpose is to practise moving one foot while the other leg remains stable.

    Sideways control is useful when stepping around furniture, moving through narrow spaces, or recovering from a sideways wobble.

    8. Small Forward Steps

    Hold the chair securely.

    Take a short step forward with your right foot. Place the whole foot on the floor, pause, and return it slowly.

    Repeat with the left foot.

    Complete five to eight steps on each side.

    Keep the step short enough that you can return without pulling heavily on the chair. Lift the foot rather than dragging it.

    This drill practises starting a step, transferring weight, and returning to a stable position.

    9. Staggered Standing

    Place your right foot slightly in front of the left, as though you have stopped halfway through a walking step.

    Keep some space between the feet from side to side. Do not place one foot directly in front of the other.

    Hold the chair and remain in this position for 10 to 20 seconds.

    Change which foot is in front and repeat.

    Complete two holds on each side.

    If the position feels difficult, widen your stance. As it becomes easier, use lighter hand pressure rather than bringing your feet closer together too quickly.

    10. Supported Foot Hover

    Hold the chair with both hands.

    Move your weight onto your left leg. Keep the toes of your right foot on the floor but make that foot as light as possible.

    Hold for three to five seconds, then change sides.

    Once this feels controlled, you may lift the toes one centimetre from the floor.

    Complete two or three holds per side.

    There is no need to lift the foot high. A tiny hover is enough to challenge the supporting leg.

    11. Mini Knee Bends

    Stand with your feet hip-width apart.

    Hold the chair and bend your knees slightly, as though you are beginning to sit down. Keep your heels on the floor and your knees pointing in the same direction as your toes.

    Straighten slowly.

    Complete five to eight repetitions.

    This is not a deep squat. A small bend is enough to strengthen the thighs and practise lowering the body under control.

    Stop if the movement causes sharp or increasing pain.

    12. Slow Sit-to-Stand

    Finish with a functional movement used throughout daily life.

    Sit towards the front of a firm chair that cannot slide. Place your feet flat and slightly behind your knees.

    Lean forward from the hips. Press through your feet and use the armrests or seat if needed to stand.

    Pause until you feel steady.

    Push your hips backwards and lower yourself slowly.

    Complete three to eight repetitions.

    Avoid dropping into the chair. The lowering stage strengthens the legs and teaches controlled movement.

    If standing fully is difficult, practise leaning forward and briefly making your hips lighter on the seat before sitting back.

    A Simple First-Week Plan

    You do not need to complete every exercise immediately.

    During your first week, choose:

    • Calm standing reset
    • Side-to-side weight shifts
    • Alternating heel lifts
    • Slow supported marching
    • Slow sit-to-stand

    Perform one set two or three times during the week.

    During the second week, add toe lifts and side taps. Staggered standing and foot hovers can be introduced later when the earlier movements feel familiar.

    A slow routine should leave you feeling exercised but not exhausted. Stop before tiredness causes your posture or foot placement to deteriorate.

    How to Progress Without Rushing

    Progress by changing one feature at a time.

    You might:

    • Add two repetitions
    • Extend a hold by five seconds
    • Move more slowly
    • Take a slightly wider step
    • Use less pressure through your hands
    • Complete one additional sit-to-stand
    • Pause slightly longer during a foot lift

    Do not increase the duration, movement size, and balance difficulty simultaneously.

    Avoid closing your eyes, standing on cushions, or using unstable furniture. These changes can make balance exercises much harder and may increase fall risk.

    Progress may also mean moving more smoothly, needing fewer rests, or feeling less anxious. Letting go of the chair is not the only sign of improvement.

    What a Safe Challenge Feels Like

    A gentle exercise may produce a small wobble. You should still feel able to touch or grip the chair immediately.

    Reduce the difficulty if you:

    • Grip the chair tightly
    • Hold your breath
    • Take sudden uncontrolled steps
    • Lean heavily onto the support
    • Become frightened
    • Feel dizzy or disoriented
    • Notice your knees beginning to buckle

    Widen your feet, shorten the movement, reduce the repetitions, or sit down and rest.

    Some days will feel steadier than others. Pain, fatigue, poor sleep, illness, stress, and changes in medication can affect balance. Adjusting your routine on a difficult day is sensible, not a failure.

    When to Stop and Seek Help

    Stop exercising if you experience chest pain, faintness, severe breathlessness, sudden dizziness, new numbness, unusual weakness, severe pain, confusion, loss of vision, or a feeling that you are about to fall.

    Seek urgent medical help for sudden facial drooping, difficulty speaking, one-sided weakness, fainting, or a sudden severe headache.

    Arrange an appropriate assessment if your balance worsens suddenly, you begin falling repeatedly, dizziness persists, or you regularly experience a spinning sensation.

    Exercise can support balance, but unexplained symptoms should not simply be exercised through.

    Let Small Improvements Count

    Balance progress often appears in ordinary moments.

    You may notice that you stand from a chair with less effort. You might turn in the kitchen without immediately reaching for the bench. Perhaps you feel more comfortable stepping around an object or standing long enough to adjust your clothing.

    These changes matter.

    A slow routine respects where you are while helping you move towards greater control. It replaces the pressure to perform with the opportunity to practise.

    There is no need to rush. Balance is built through calm, repeated movements that teach the body what to do next.

    Frequently Asked Questions

    1. How slow should balance exercises be?

    Move slowly enough that you can control each stage, breathe normally, and place your feet accurately. A movement should not rely on momentum. Pausing briefly between steps or weight shifts can make the exercise more controlled.

    2. How long should a beginner balance routine last?

    Five to ten minutes may be enough initially. The routine can gradually become longer as the exercises feel familiar. Stop before fatigue affects your posture, concentration, or safety.

    3. How often should older beginners practise?

    Two or three sessions per week can be a manageable starting point. Some gentle movements may eventually be practised more often if they do not worsen pain, dizziness, or fatigue.

    4. Is it acceptable to hold a chair throughout the routine?

    Yes. A sturdy chair is a useful safety tool. Use both hands until you can perform the movement without gripping or leaning. There is no requirement to exercise without support.

    5. Is a small wobble normal?

    A slight, controlled wobble can occur because the body is making adjustments. You should remain capable of touching the chair immediately. Large sways, stumbling, dizziness, or fear of falling indicate that the exercise is too difficult.

    6. What should I do if one side feels less steady?

    Use more support and reduce the movement on that side. Do not force both sides to perform identically. New, pronounced, or worsening weakness on one side should be medically assessed.

    7. Should I continue if my legs become tired?

    Stop and rest before fatigue affects your control. Mild muscle effort may be expected, but shaking legs, buckling knees, or difficulty placing your feet accurately indicate that the session should end.

    8. Can slow balance exercises prevent every fall?

    No exercise routine can prevent every fall. Balance and strengthening exercises may help reduce risk, but eyesight, medicines, footwear, blood pressure, home hazards, sensation, and health conditions may also affect stability.

    Free Tai Chi Walking: Fall‑Prevention Edition Printables

    Free Tai Chi Walking: Fall‑Prevention Edition Printables

    Get Your Copy Today
  • Find Your Rhythm: Gentle Balance Practice for Better Coordination

    Find Your Rhythm: Gentle Balance Practice for Better Coordination

    Margaret noticed the problem while setting the table.

    She carried two plates into the dining room, turned towards the table, and felt her feet hesitate. Her mind knew where she wanted to go, but her body seemed to complete the instructions in the wrong order. One foot moved too soon, the other followed awkwardly, and she reached for the chair.

    Nothing dramatic happened. She did not fall or drop the plates. Yet the moment stayed with her.

    After that, she became more cautious. She stopped carrying objects in both hands. She paused before changing direction and looked down whenever she stepped around furniture. Ordinary movements that had once happened automatically now required concentration.

    Poor coordination can make balance feel unpredictable. A person may have enough strength to stand but struggle to organise the movements needed for stepping, turning, reaching, or shifting weight. The feet may move at different speeds, or the upper and lower body may seem briefly out of rhythm.

    Beginner balance exercises for seniors with poor coordination can help by simplifying movement. Instead of asking the body to perform several actions at once, the routine breaks everyday skills into smaller parts. Each exercise is slow, supported, and repeated in a predictable pattern.

    The goal is not perfect performance. It is clearer, calmer movement.

    What Does Coordination Mean?

    Coordination is the body’s ability to organise movement in the right order, at the right speed, and with an appropriate amount of force.

    Consider the simple act of taking a step.

    First, your weight moves onto one leg. The opposite foot becomes lighter and leaves the floor. It travels forward, lands in a suitable position, and begins accepting your weight. Your arms, trunk, eyes, and head adjust while this happens.

    When coordination is working well, the sequence feels automatic.

    When it becomes less reliable, you may notice:

    • Hesitation before stepping
    • Uneven or poorly timed foot movements
    • Difficulty changing direction
    • Feet crossing unexpectedly
    • Trouble copying a movement
    • One side moving more slowly
    • Loss of rhythm during marching
    • Difficulty moving the arms and legs together
    • Greater unsteadiness when distracted
    • A need to watch the feet constantly

    Coordination difficulties can be influenced by reduced activity, muscle weakness, pain, eyesight, sensation, medicines, fatigue, or health conditions affecting the brain, nerves, joints, or inner ears. New or worsening problems should therefore be assessed rather than assumed to be an unavoidable part of ageing. citeturn526861search0

    Sudden Poor Coordination Requires Urgent Attention

    A gradual loss of confidence after inactivity is different from a sudden inability to coordinate movement.

    Seek urgent medical help if poor coordination begins abruptly or occurs with:

    • Facial drooping
    • Difficulty speaking or understanding speech
    • New weakness or numbness
    • Sudden vision changes
    • A severe, unusual headache
    • Fainting
    • Chest pain
    • Severe dizziness
    • Confusion
    • An inability to stand or walk normally

    Do not attempt to exercise through these symptoms.

    Arrange a non-urgent assessment when coordination has been gradually worsening, falls are becoming more frequent, one foot repeatedly drags, or ordinary movements have changed without a clear explanation.

    A balance routine can improve movement practice, but it cannot diagnose the cause of poor coordination.

    Make the Routine Predictable

    Complicated exercises are not necessary.

    In fact, combining too many instructions may make movement less controlled. A beginner may struggle when asked to march, turn the head, count backwards, and move the arms simultaneously.

    Start with one task at a time.

    Learn the foot movement before adding an arm movement. Practise stepping before trying to talk while stepping. Complete a turn slowly before attempting to carry anything.

    Predictability helps the brain recognise the pattern. Repeating the same small sequence can gradually make the movement feel more familiar.

    Prepare a Safe Exercise Area

    Choose a firm, level floor with good lighting.

    Place a sturdy chair in front of you. It should not have wheels, rock, fold unexpectedly, or slide when pressure is applied. Position its back against a wall whenever possible.

    Clear away:

    • Loose rugs
    • Electrical cords
    • Bags and footwear
    • Pet toys
    • Low furniture
    • Wet or slippery areas
    • Objects that may distract you

    Wear secure, well-fitting footwear with nonslip soles.

    Keep another chair nearby for seated rest. Someone should remain with you if you have fallen recently, require help to stand, or cannot reliably place your feet where intended.

    Begin all standing exercises with both hands on the chair. Reducing support is optional and should happen only when the movement is consistently controlled.

    Begin With Seated Coordination Practice

    Seated exercises allow you to learn movement patterns without immediately managing your full standing balance.

    Sit in a firm chair with both feet flat on the floor.

    1. Alternating Heel Taps

    Lift your right heel while keeping the toes down.

    Lower it completely, then lift the left heel.

    Continue slowly for 10 to 20 alternating repetitions.

    Say “right” and “left” quietly if this helps you maintain the pattern.

    Do not move faster when the rhythm becomes uneven. Stop, reset both feet, and begin again.

    This simple sequence practises alternating movement, which is also used during walking.

    2. Toe and Heel Pattern

    Keep both heels down and lift the toes.

    Lower the toes, then lift both heels.

    Continue using the pattern:

    Toes up, down, heels up, down.

    Complete six to ten cycles.

    Move slowly enough to separate each part of the sequence. If both feet do not move together, practise one foot at a time before returning to the two-foot version.

    3. Seated March and Pause

    Lift the right foot slightly and hold it for one second.

    Place it down completely. Lift the left foot, pause, and lower it.

    Complete 10 to 20 alternating repetitions.

    The knee does not need to rise high. Focus on making each side complete the same sequence:

    Lift, pause, lower, change.

    Avoid rushing directly from one foot to the other.

    4. Hand-to-Thigh Taps

    Place both hands on your thighs.

    Lift the right hand and tap the right thigh twice. Repeat with the left hand.

    Continue slowly for five rounds.

    Next, alternate one tap per side:

    Right, left, right, left.

    This introduces rhythm without challenging standing balance.

    When the movement feels comfortable, try tapping the opposite thigh. Move the right hand to the left thigh, return it, and then move the left hand to the right thigh.

    Stop if crossing the body causes pain, dizziness, or confusion that does not settle when you slow down.

    5. Seated Hand and Foot Match

    Lift the right heel and raise the right hand at the same time.

    Lower both. Repeat on the left.

    Complete six to ten repetitions per side.

    If coordinating the hand and foot is difficult, practise the heel movement first. Add the hand only after the foot pattern feels familiar.

    Coordination is built in layers. There is no need to perform the complete movement immediately.

    Supported Standing and Coordination Routine

    Stand only when you feel ready. Keep both hands available for support and complete one set of each exercise.

    1. Centred Standing Reset

    Stand behind the chair with your feet approximately hip-width apart.

    Keep your knees softly relaxed and look forward. Allow your weight to spread across both feet.

    Take five slow breaths.

    Hold for 20 to 30 seconds.

    This gives you a stable starting position. Return to it whenever an exercise loses its rhythm.

    2. Side-to-Side Weight Shifts

    Move a small amount of weight onto your right foot.

    Pause, return to the centre, and shift towards the left.

    Complete eight shifts in each direction.

    Use a simple rhythm:

    Right, centre, left, centre.

    Keep both feet on the floor. Do not add a foot lift until the shift itself feels smooth.

    Weight shifting prepares one leg to support the body before the other foot moves.

    3. Alternating Heel Raises

    Lift the right heel while keeping the toes down.

    Lower it completely, then lift the left heel.

    Continue for 12 to 20 repetitions.

    Watch for the rhythm becoming faster on one side. Each heel should complete its movement before the other begins.

    This pattern introduces alternating weight transfer while both feet remain partly connected to the floor.

    4. Foot Unweighting

    Shift onto your left leg.

    Keep the right toes on the floor but reduce the pressure through them. Hold for two seconds, then return to the centre.

    Repeat on the opposite side.

    Complete three to five attempts per leg.

    Use the sequence:

    Shift, lighten, hold, return.

    Do not lift the foot until you can complete these four stages calmly.

    5. Supported March and Pause

    Hold the chair with both hands.

    Lift the right foot one or two centimetres. Pause for one second and place it down fully.

    Repeat on the left.

    Continue for 10 to 16 alternating steps.

    If you begin lifting one foot before the other has landed, stop and reset.

    Good coordination depends on completing one movement before starting the next.

    6. Side Tap and Return

    Shift your weight onto the left leg.

    Move the right foot a short distance to the side and tap the floor. Bring it back beneath you.

    Repeat five to eight times, then change sides.

    Use the same sequence each time:

    Shift, tap, return, centre.

    Keep the step small. Accuracy is more important than distance.

    7. Forward Tap Pattern

    Move the right foot a short distance forward and tap the heel or whole foot down.

    Return it to the starting position. Repeat with the left foot.

    Complete five to eight taps per side.

    Try alternating in a steady pattern rather than completing all repetitions on one leg first.

    Look down briefly when needed, but return your gaze forward once the foot is secure.

    8. Two-Direction Taps

    Shift your weight onto the left leg.

    Tap the right foot forward and return it. Tap the same foot to the side and return.

    Repeat the pattern three to five times, then change legs.

    The sequence is:

    Forward, centre, side, centre.

    Move slowly. If the pattern becomes confusing, return to practising only one direction.

    9. Step-Together Practice

    Stand behind a long, secure bench or beside a fixed support.

    Step the right foot a short distance to the side. Bring the left foot towards it.

    Pause with both feet stable.

    Repeat for two or three steps, then travel back in the opposite direction.

    Do not cross the feet. Each movement should be separate:

    Step, together, pause.

    This exercise helps organise sideways movement used when navigating furniture and narrow spaces.

    10. Supported Clock Taps

    Imagine you are standing in the centre of a clock.

    Keep your weight mainly on the left leg. Tap the right foot towards 12 o’clock and return to the centre.

    Next, tap towards 3 o’clock and return.

    Complete the two-direction pattern three times, then change legs.

    Do not add more directions until these two feel predictable.

    Clock taps practise choosing and controlling a foot movement without requiring a large step.

    11. Small-Step Turns

    Hold the chair and take several small steps to turn slightly towards the right.

    Pause and return to the centre.

    Repeat towards the left.

    Complete three turns in each direction.

    Avoid twisting on planted feet. Use a simple pattern:

    Step, step, stop.

    Turning often becomes disorganised when the upper body moves before the feet. Slowing the turn gives each foot time to find a secure position.

    12. Controlled Sit-to-Stand

    Sit towards the front of a firm chair that cannot slide.

    Place both feet flat and slightly behind your knees.

    Lean forward from the hips, press through your feet, and use the armrests or seat if needed to stand.

    Pause until you feel steady.

    Move your hips backwards and lower yourself slowly.

    Complete three to eight repetitions.

    Use the sequence:

    Lean, press, stand, pause, lower.

    Do not begin walking immediately after standing. Allow your body to settle first.

    A Five-Minute Starter Routine

    During the first week, practise:

    1. Seated marching
    2. Hand-to-thigh taps
    3. Centred standing
    4. Side-to-side weight shifts
    5. Supported marching
    6. Two or three sit-to-stands

    Complete one set on two or three days.

    Once these movements feel familiar, add directional taps, side stepping, and small turns.

    Older adults generally benefit from physical activity that combines balance work with aerobic and muscle-strengthening activity, adjusted to individual ability and health. citeturn526861search5turn526861search36

    Use Rhythm, but Do Not Rush

    A slow spoken rhythm may help organise movement.

    You might say:

    • “Lift, lower, change.”
    • “Step, together, pause.”
    • “Right, centre, left, centre.”
    • “Forward, back, stop.”

    The words should support the movement rather than hurry it.

    Music may help some people, but a fast or changing beat can make coordination more difficult. Begin without music or use a slow, predictable rhythm.

    If the movement becomes less accurate, reduce the speed. Coordination improves through correct repetition, not through completing the greatest number of movements.

    Avoid Adding Distractions Too Soon

    Walking while talking, carrying objects, looking around, or thinking about another task requires divided attention.

    These are normal parts of daily life, but they can make balance more difficult. A beginner should learn the basic movement first.

    Do not initially combine balance exercises with:

    • Counting backwards
    • Fast conversation
    • Head turning
    • Carrying drinks
    • Closing the eyes
    • Standing on soft surfaces
    • Rapid changes of direction

    Later, an appropriate professional may introduce carefully selected combined tasks when these reflect the person’s needs.

    Home-based exercise that includes balance and strength work can improve physical function in older adults, but exercises must be matched to the individual’s capabilities. citeturn526861search23

    How to Progress Safely

    Change only one feature at a time.

    You may:

    • Add two repetitions
    • Pause for one extra second
    • Use slightly lighter hand pressure
    • Add one new tap direction
    • Complete one additional side step
    • Perform one extra sit-to-stand
    • Practise the same routine one more day per week

    Do not reduce support, add speed, and introduce a complicated pattern simultaneously.

    Progress may mean fewer misplaced steps, a steadier rhythm, or less need to watch the feet. It does not require performing difficult exercises.

    Fatigue Can Make Coordination Worse

    Movements that are controlled at the beginning of a session may become disorganised as the body tires.

    Stop when you notice:

    • Feet crossing unexpectedly
    • Toes catching the floor
    • One leg moving much more slowly
    • Increasing reliance on the chair
    • Shaking or buckling knees
    • Confusion about the sequence
    • Heavy breathing
    • Dizziness
    • Growing anxiety

    Rest rather than forcing additional repetitions.

    Poor-quality practice may reinforce awkward movement and increase fall risk.

    Let Everyday Tasks Reveal Progress

    Improved coordination may first appear outside the exercise routine.

    You may turn in the kitchen without your feet becoming tangled. Perhaps you step around a chair without stopping to plan every movement. You might stand, pause, and begin walking in a smoother sequence.

    These improvements can seem small, but they make daily movement feel more dependable.

    Do not compare your rhythm with someone else’s. Your goal is not speed or elegance. It is to help your body complete one clear movement and prepare safely for the next.

    Start slowly. Use the chair. Repeat the pattern until it feels familiar. Better coordination is often built one deliberate step at a time.

    Frequently Asked Questions

    1. Can poor coordination improve with exercise?

    Some coordination skills can improve through repeated, appropriate practice. Results depend on the cause of the difficulty. Problems related to inactivity may respond differently from those involving neurological, sensory, visual, or medical conditions.

    2. How slowly should the exercises be performed?

    Move slowly enough to complete each stage before beginning the next. If the rhythm becomes uneven or a foot lands unpredictably, pause, reset, and reduce the speed.

    3. Should I watch my feet?

    Look down briefly when learning a new foot pattern or checking placement. Once the feet are secure, return your gaze forward. Constantly staring down may affect posture and awareness of the space ahead.

    4. How often should beginners practise?

    Two or three short sessions per week can be a practical starting point. Stop before fatigue reduces accuracy or safety.

    5. Is it acceptable to hold the chair throughout?

    Yes. A sturdy chair or fixed bench provides valuable support. Use both hands until movements become predictable and controlled. Exercising without support is not required.

    6. Why is coordination worse when I am distracted?

    The brain has limited attention available for several tasks at once. Talking, carrying objects, or looking around may leave less attention for foot placement and balance, particularly when the movement is not yet automatic.

    7. What if one side moves less accurately?

    Use more support, slow the movement, and simplify the exercise on that side. New, substantial, or worsening one-sided coordination problems should be medically assessed.

    8. Can coordination exercises prevent every fall?

    No. They may improve movement timing and foot placement, but fall risk can also be affected by strength, eyesight, sensation, medicines, blood pressure, fatigue, footwear, health conditions, and environmental hazards.

    Free Tai Chi Walking: Fall‑Prevention Edition Printables

    Free Tai Chi Walking: Fall‑Prevention Edition Printables

    Get Your Copy Today